Showing posts with label Holiday. Show all posts

Sunday, December 17, 2023

English Toffee Chunks

English Toffee Chunks


There already exists on this site a fine recipe for English toffee. Lately, though, I've had this itch to make a more bite-sized (maybe two-bite sized) version of this holiday favorite. I wanted to make a more manageable size, and I also wanted to use a method of coating the pieces in chocolate that was not as labor-intensive as my usual.

I actually figure out a better way to coat larger pieces, but smaller pieces are cuter and easier to eat. So I cut this batch up into various small sizes, and the results are what you see here: delicious, buttery sweet, crunchy, nutty, flavorful deliciousness. I have to say, I'm pretty proud of myself. 😁

Who knows what this year will bring, but I do plan to make these again for next Christmas, and maybe then I will remember to document the process to update this post. Until then, email me with questions if you have any.

Enjoy!


English Toffee Chunks

Ingredients
  • 1 cup coarsely chopped roasted almonds 
  • 1 1/2 cups finely chopped roasted almonds
  • 3/4 cup packed C & H Light Brown Sugar 
  • 3/4 cups  C & H white sugar
  • 1 cup butter
  • 9 to 12 ounces chocolate*, melted and tempered (I like to use Dove Milk Chocolate)
Instructions
1. Line a rectangular Pyrex/glass pan (9x13) with parchment paper (Do not use a metal pan for this). Spread coarse nuts in bottom of pan. Set aside.
2. In a heavy saucepan heat butter and sugar to boiling over medium heat, stirring constantly. Boil over medium heat until it reaches 300° on a candy thermometer. At that point immediately pour and spread over the nuts. Allow to cool 5-6 minutes.
3. While the toffee is still relatively soft, but not liquid, lift the toffee out of the pan using the parchment paper and place on a cutting surface. (For me, my warm glass top stove worked well because it kept the toffee a little warm, preventing it from solidifying before I'd cut it up.)
4. Using a sharp knife or a pizza cutter, cut the toffee into small pieces, like 1 cm x 2 cm. Toffee may not completely separate, but that's okay; you can break it apart later. When toffee is cool and firm, gently break the pieces apart and move to a pan lined with paper towels to absorb any excess butter.
5. Set aside 1 to 2 ounces of the chocolate, and then over a double boiler set on medium heat (don't boil the water), melt chocolate until it is 2/3 melted. Remove from heat and stir until completely melted. Add a little of the reserved chocolate and stir until melted. Repeat until all chocolate is gone or the additional chocolate does not melt within about 3-4 minutes of stirring. 
6. 
Place finely chopped nuts in a dish or pan that has some depth and will allow you to toss the toffee nuggets easily.  (I used a deeper Pyrex pan that I think is 7" x 11".) Line a half-sheet pan with parchment and set aside.
7. (This is where it could get tricky.) Place 3/4 of the  the toffee chunks into the chocolate and stir to coat. Then using a fork, or small tongs, move 7 - 8 pieces of the coated toffee into the almond pan. Shake to start coating and then toss the toffee with your hands to finish coating completely with the chopped nuts. Remove coated pieces to the prepared parchment-lined pan to cool and firm up. Repeat with remaining toffee chunks. If the chocolate starts to get too firm (and it will), place bowl over the double boiler again and stir to loosen up the chocolate--usually only 30-60 seconds. Then continue with the coating process. 
8. If you have extra chocolate in the bowl, add any other naked toffee that remains, and follow the coating instructions in step 7. 
9. Allow all pieces to cool and firm up, then place in an airtight container. Divide up into smaller airtight containers and share with family and friends, if desired.

Makes a little over 2 pounds of toffee chunks

*I think 9 ounces will suffice, but to tell the truth, I didn't measure when I did this, and I probably won't make these again until next year. You may end up with some uncoated pieces of toffee. There are worse things to end up with, though, right?


Dove Chocolate unwrapped and ready to be melted and tempered.


Monday, December 12, 2022

Cinnamon Toffee Almonds


Cinnamon Toffee Almonds

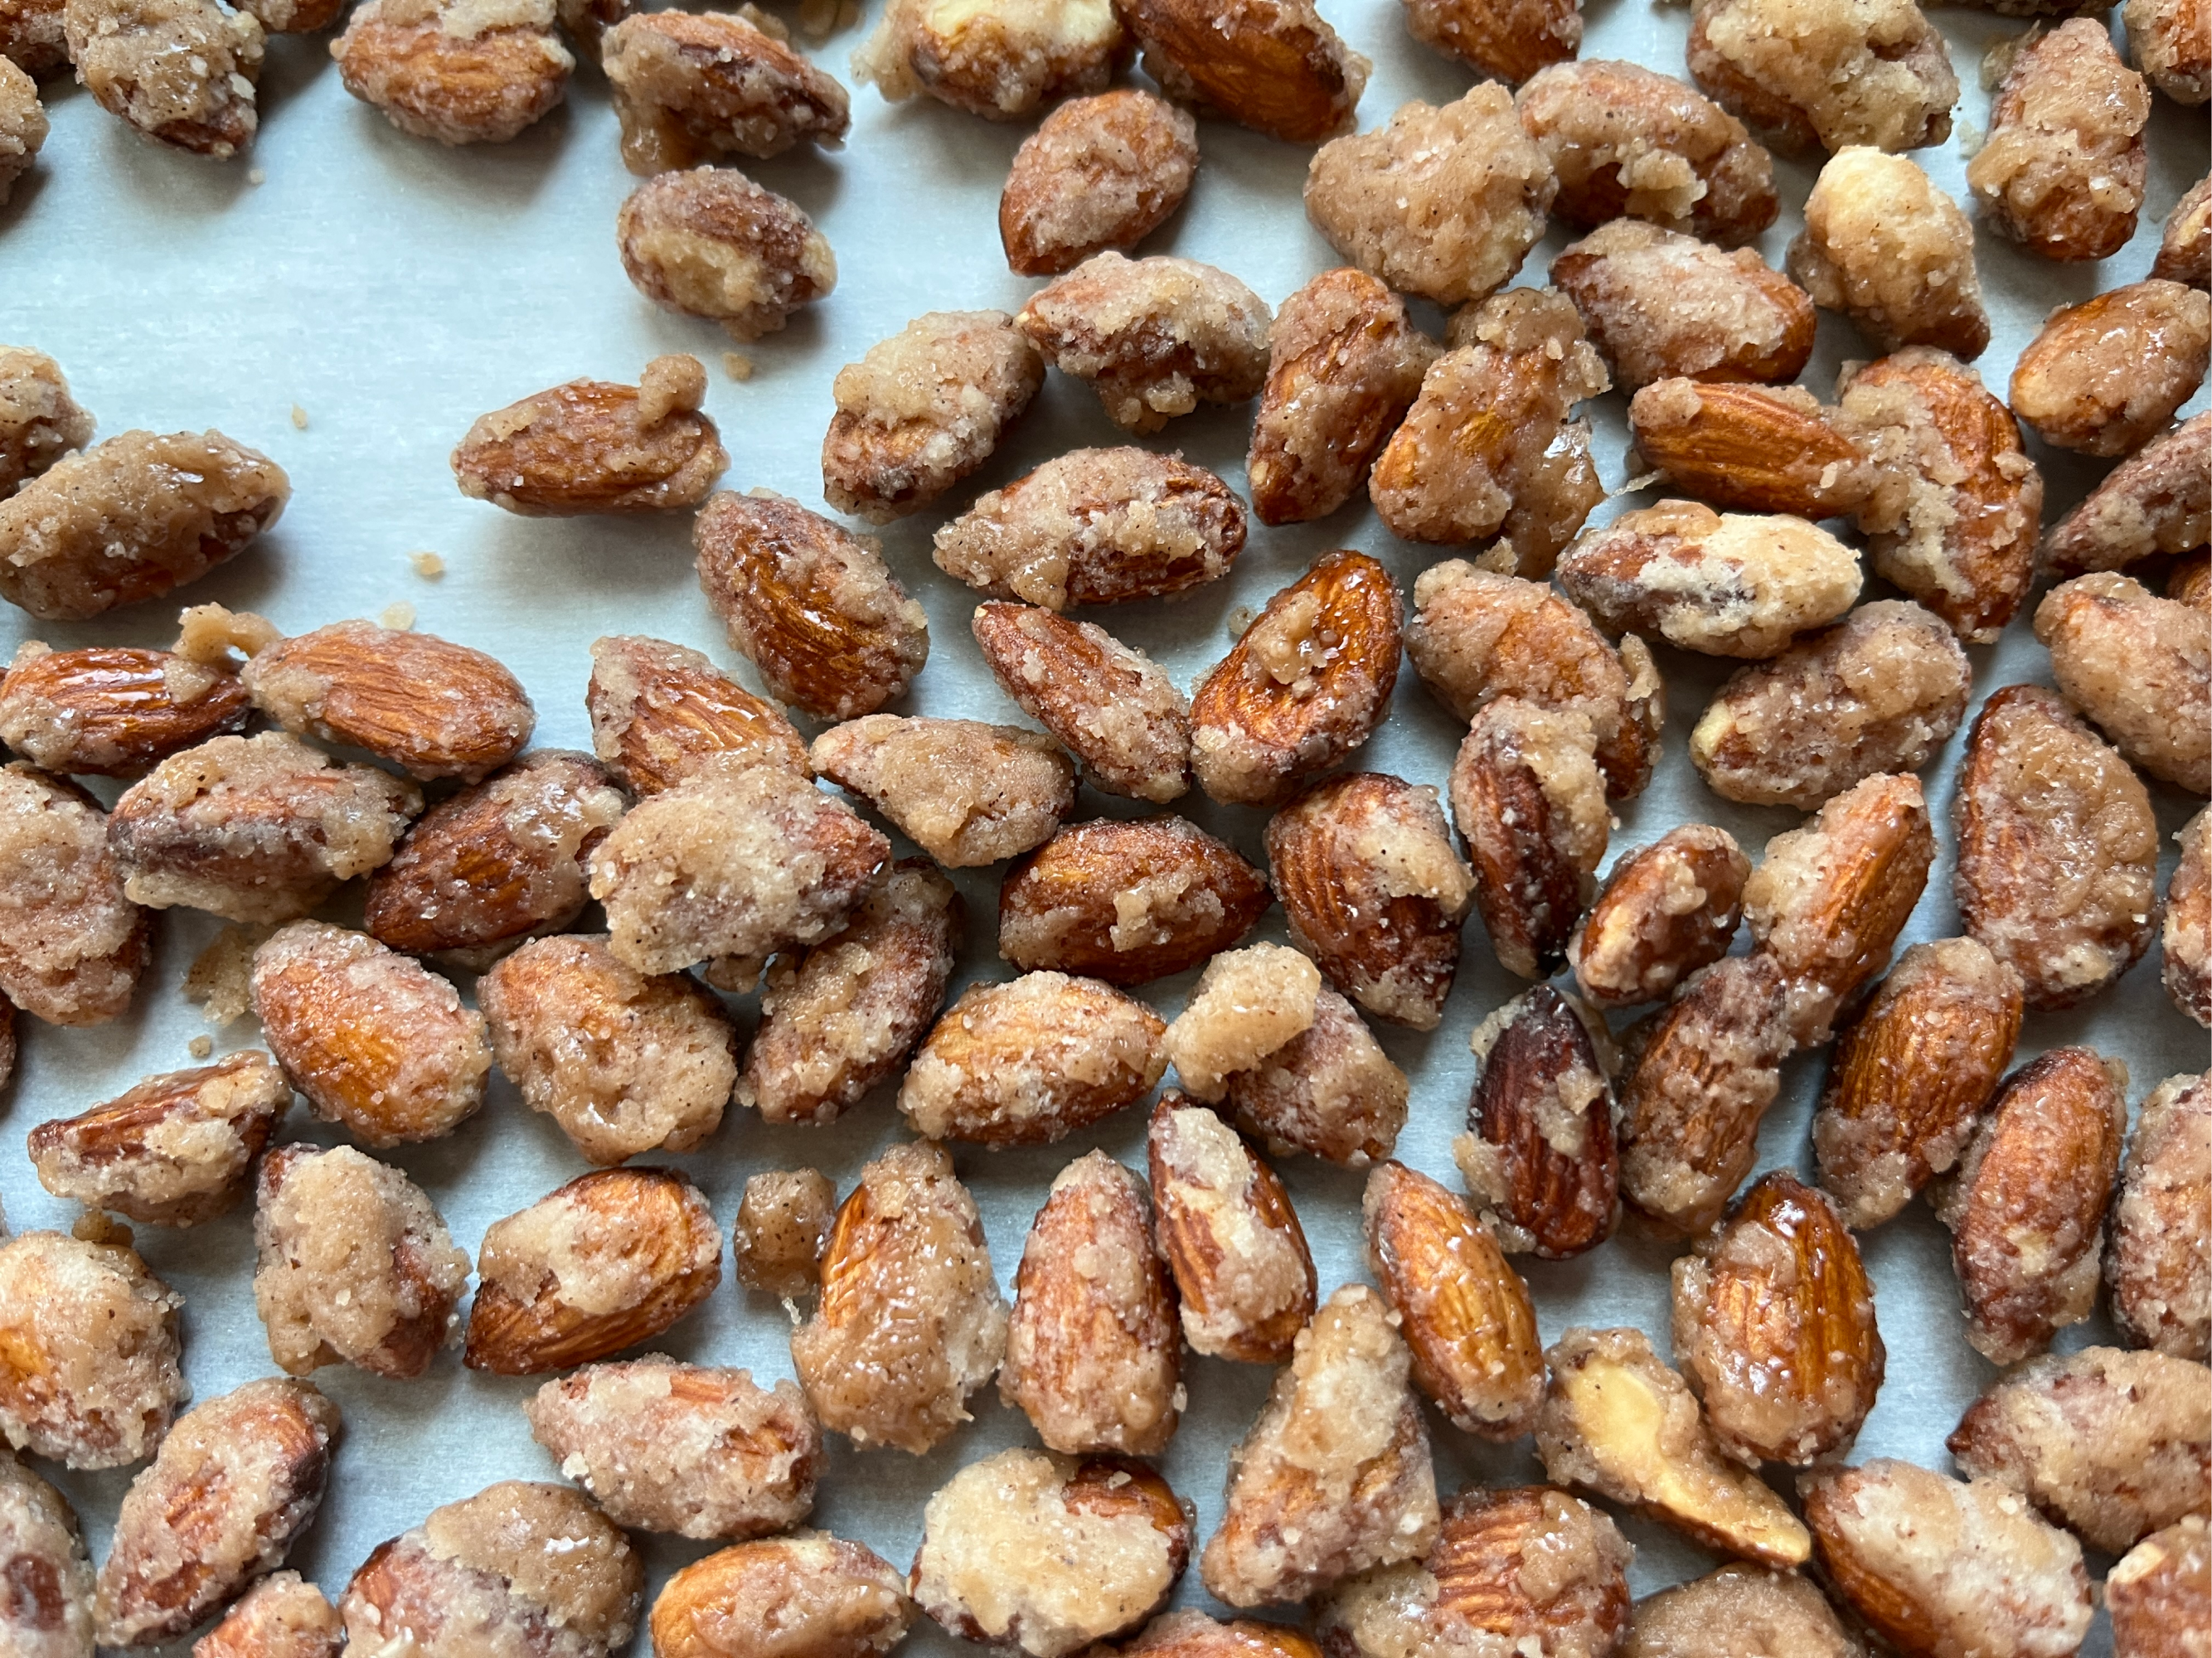
These tasty nuts are just a variation on the butter toffee pecans two posts ago. I decided to make them after finally giving up on finding the Salted Caramel Churro Almonds that had been available at Sam's Club earlier this year. They have been out of stock for months now. 
This recipe here is not exactly as I remember the Sam's Club almonds, but they're delicious nonetheless.
Next time I will probably use fewer almonds than I did this time (I used more than noted in the recipe below) because I just don't think mine had enough of the toffee coating. I will also use more cinnamon, as I went conservative with the ones pictured, using only 1/2 teaspoon of ground cinnamon. 

Cinnamon Toffee Almonds

Ingredients:
  • 3 tablespoons butter
  • 3/4 cup white sugar
  • 1/4 cup water
  • 2 cups raw almonds
  • 1/2 teaspoon kosher salt (I used Morton brand)
  • 1/2 to 1 teaspoon ground cinnamon (amount depends on your preferred level of cinnamon)
Instructions:
  • In a small bowl, combine the salt and cinnamon, and set aside. Then line a cookie sheet with parchment paper and also set aside.
  • In a large non-stick pan/skillet over medium heat, melt the butter.
  • Add sugar and water and stir with a silicone spatula to combine.
  • When the liquid starts to simmer and all of the sugar is melted, add the nuts.
  • Stir continually until all water is evaporated and the sugar starts to looks crusty.
  • Sprinkle the salt & cinnamon mixture evenly over the nuts and then stir.
  • Continue to stir until sugar starts to look a bit shiny on the outside of the nuts--it will not get completely shiny (see pics below for reference).
  • Pour nuts onto the prepared cookie sheet and separate the nuts as much as possible with the silicone spatula or other heat-proof utensil.
  • Allow nuts to cool completely before enjoying. Nuts will get crunchier as they cool.
  • Store in an airtight container.

Makes about 2 1/2 cups


Sugar is melted and ready for nuts.


Add salt & cinnamon when nuts look like this.


Thursday, December 8, 2022

Heidi's Pecan Pie


Heidi's Pecan Pie

Last Thanksgiving was the first time I ever actually tasted pecan pie. Call me an apple-pie-person. At any rate, my dear sister-in-law Heidi always makes the pecan pie for Thanksgiving dinner. She really just follows the recipe on the back of the Karo Syrup bottle, with one small tweak: she adds a teaspoon of butter flavor/extract, and it really makes all the difference in the world.

The fact that Heidi's pecan pie is superior to other pecan pies was proven to me yesterday when I tried some Perkins Restaurant pecan pie that was left over from our holiday meeting at work. The pecan pie tasted fine, but not delicious, and not really worth the calories, in my opinion. (Sorry, Perkins.) The big difference, I think, was the butter flavor. Mmmm.

So, if you are already a pecan pie fan, or are open to the idea, give this recipe a whirl. Hopefully you'll enjoy it as much as I have. 

(Note: The pie picture here is a half-recipe pie baked in a 6-inch glass pie pan.)


Heidi's Pecan Pie
   -- Adapted from Karo Syryp's Homemade Pecan Pie recipe

Ingredients:
  • 1 cup light corn syrup
  • 3 eggs, beaten lightly, room temperature
  • 1 cup white sugar
  • 2 tablespoons butter, melted & cooled
  • 1 teaspoon vanilla extract
  • 1 teaspoon butter flavor/extract
  • 1 3/4 cup pecans (about 8 oz)
  • 1 unbaked 9-inch pie crust (see recipe below)
Instructions:
  • Preheat oven to 350 degrees Fahrenheit and line a baking sheet with foil or parchment.
  • Place the corn syrup, eggs, sugar, butter, vanilla extract, and butter flavor/extract into a bowl and stir with a spoon.
  • Stir in the pecans.
  • Place the unbaked pie crust onto the prepared baking sheet, and then pour the liquid & pecan mixture into the pie crust.
  • Bake at 350 degrees for 60-70 minutes, or until the internal temperature of the pie reaches 200 degrees Fahrenheit.
  • Remove from oven and place on a wire rack to cool completely and then refrigerate so the pie can set up. After that you can serve cold or at room temperature.
  • Cover and store leftovers in the refrigerator.

Makes 1 9-inch pie

(Note: the pie pictured here is a half-size pie.)

Liquid ingredients mixed and ready for pecans


You'll end up with quite a bit of pie crust scraps.


Pie Crust

Ingredients: 
  • 1 1/4 cups all-purpose flour, plus more for dusting
  • 1/2 teaspoon salt
  • 4 tablespoons butter, cut into 1/2 inch pieces
  • 3 tablespoons vegetable shortening
  • 3-4 tablespoons ice cold water
Instructions:
  • Place flour and salt in a medium size bowl and stir to distribute the salt evenly.
  • Cut in the 4 tablespoons of butter until butter is in 1/4-inch chunks.
  • Cut in the vegetable shortening until the shortening is in 1/4-inch chunks, and the butter is cut pretty finely.
  • Add the cold water to the mixture by sprinkling in one tablespoon at a time while you toss with a fork. 
  • After you've added 3 tablespoons of water, try squeezing the dough together. If it does not stick well, add up to 1 more tablespoon of water and mixt just until combined. You will have a lot of dry parts, but that's okay.
  • Start pressing and squeezing the dough to form a cohesive ball. Try not to overwork the dough or else you'll end up with a tough crust.
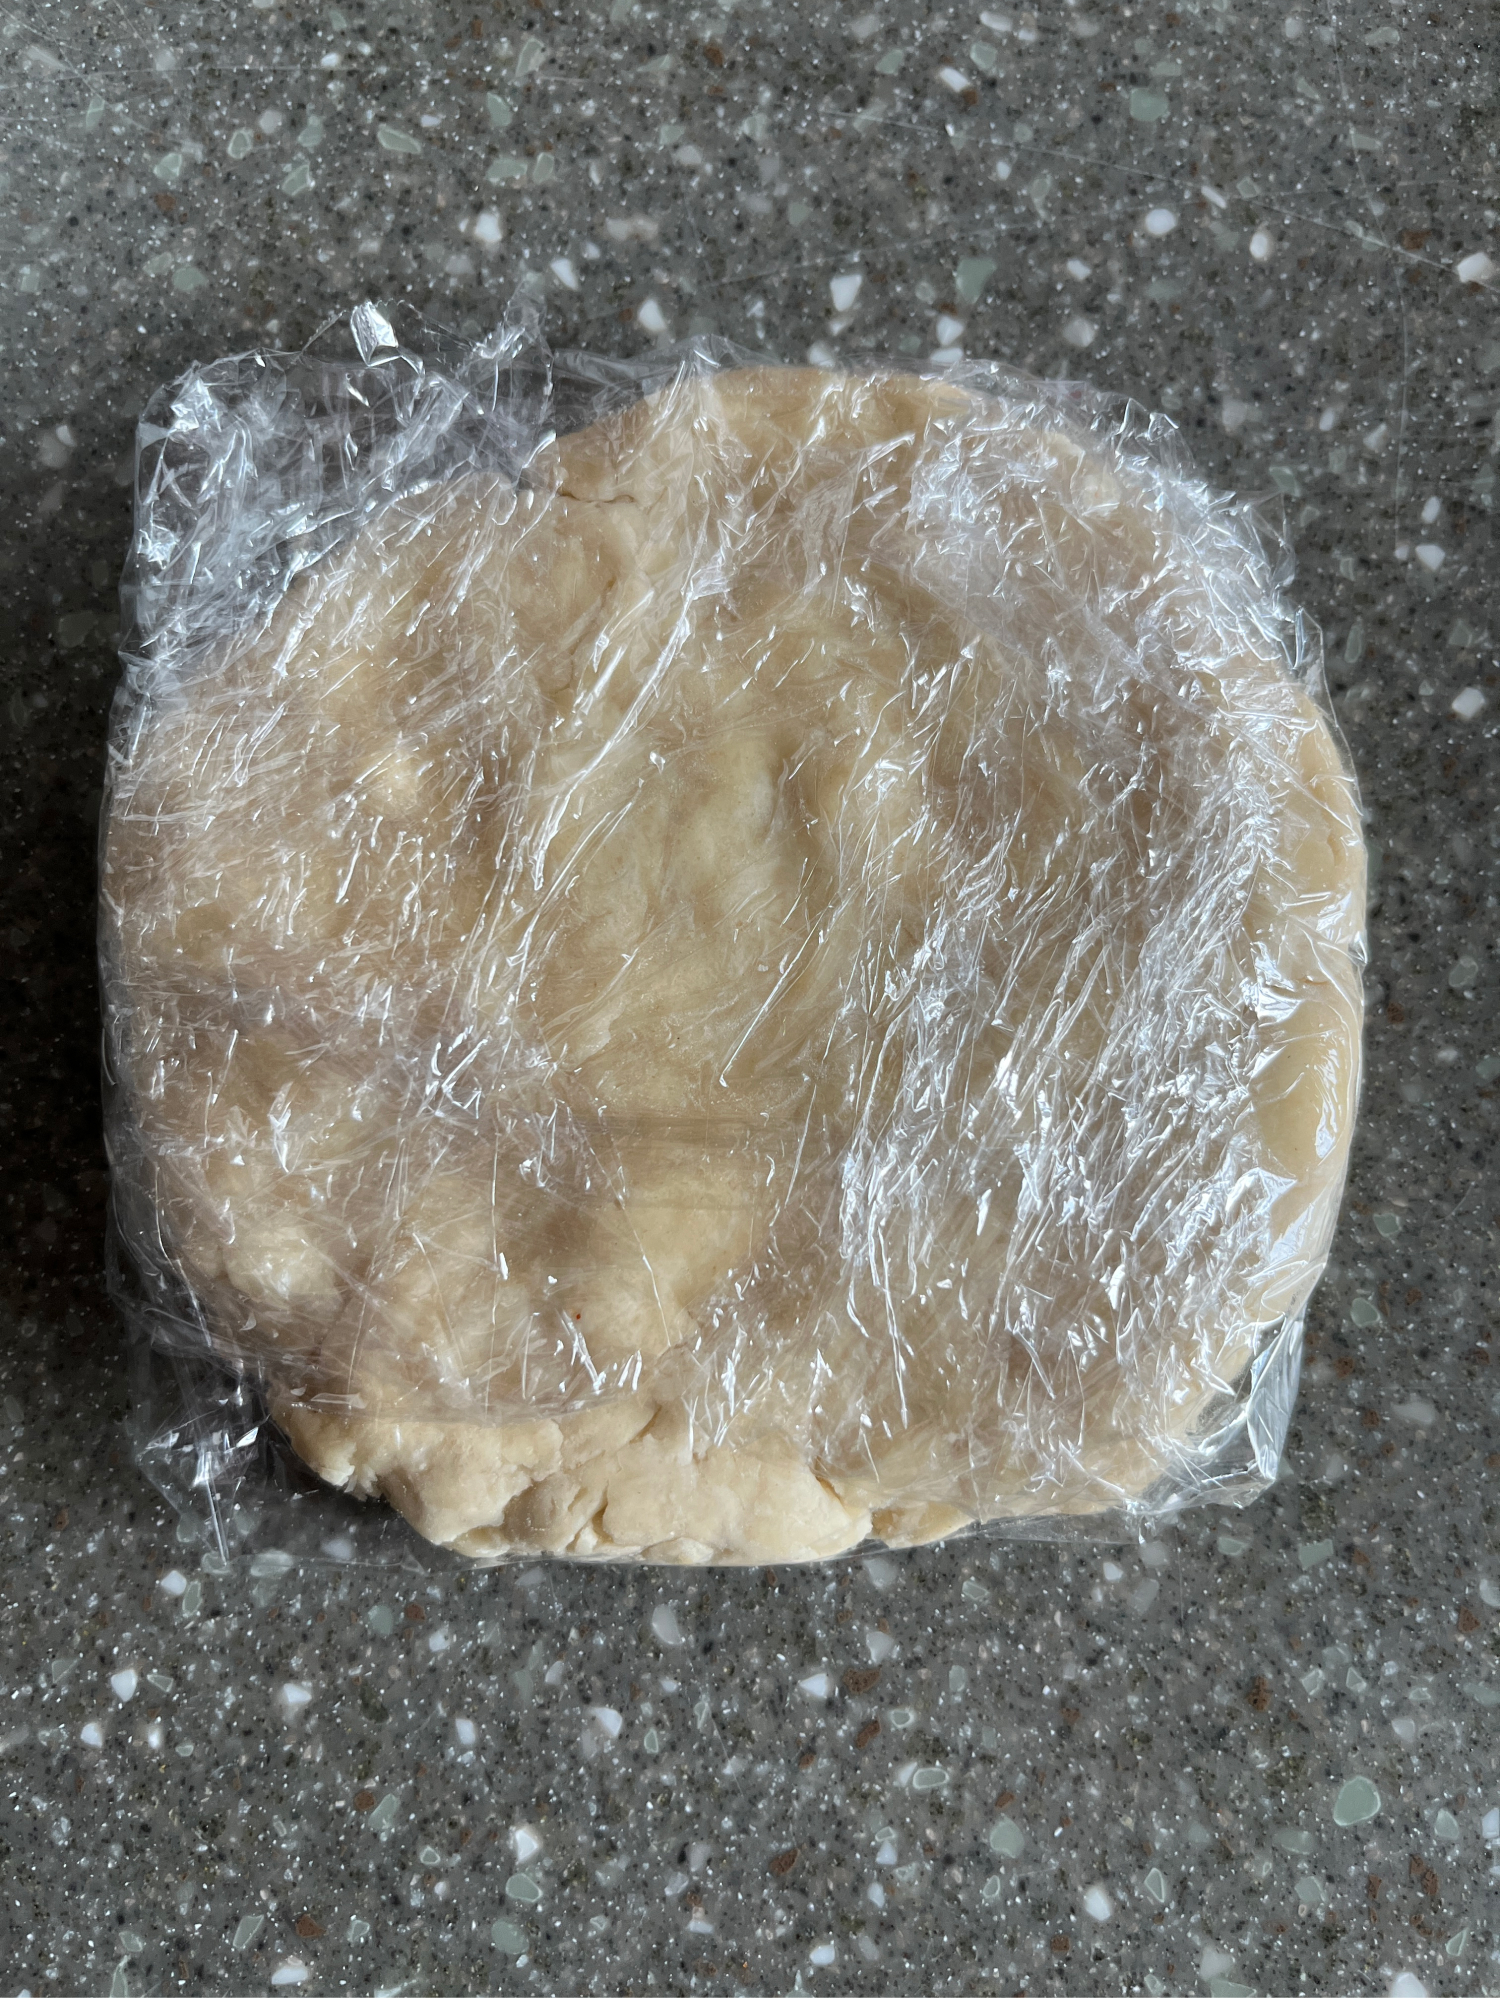
  • Once the dough is cohesive, place a 1 foot piece of plastic wrap on the counter and then try to form the dough into a disk on top of the plastic. Smoosh the disk to about 6-7 inches in diameter. Wrap the dough in the plastic wrap and refrigerate while you prepare the pie filling.
  • Roll the dough to a thickness of 1/8 inch. 
  • If dough is nowhere near a perfect circle shape, cut off a piece that sticks out, dab with a little water, and place on a spot that needs more dough. Continue to roll out until you have a circle of crust that will fill the pie plate.
  • If you're not sure what to do at this point, you're probably best off going over to Youtube to see how other people form and shape their pie crust. My words won't do the process justice.
  • Makes one 9-inch pie crust 
Mixture before adding water

After stirring in water

The cohesive mass

Wrapped and ready for refrigeration


Saturday, December 19, 2015

Two-Hour Caramels: Worth Every Minute

Slow-cooked caramels with almonds. 
Some got a little dip in Dove milk chocolate.
Caramels wrapped simply in wax paper

When I was growing up in Southern California, Christmastime involved a box or two of Sees Candy--Nuts and Chews to be precise. And my favorite grew to be the cube of caramel with almonds, dipped halfway in milk or dark chocolate. The caramel was rich and sweet, just firm enough to be chewy as opposed to gooey. The nuts were always crunchy and the chocolate just rounded off the whole experience.
Sees' almond caramels had many more almonds than these, I think, but the main point of this project was the caramel. I was determined to devote two hours on a weeknight to making these things because the picture I saw on King Arthur Flour's Instagram had me hooked.
They were this deep brown caramel color--definitely not the same as the light colored caramels I was used to making.
So far I've made these twice. I've made this caramel many times now (some might say too many times). The first time I somehow omitted the brown sugar and only used the four cups of white sugar. They still turned out fabulous. When I've made the caramels with brown sugar, it obviously produced a larger volume of caramel.
I think that I might prefer the first caramel made with only four cups of white sugar. I also used heavy cream and 1% milk, since I had those on hand, rather than the half and half. For some reason, I think the flavor if that first batch is a bit deeper and more complex, I think because it has a higher percentage of salt due to the omission of some sugar.
Either way, this is a winning recipe, totally worth the time it takes to make them. 
One of these batches makes a LOT of caramels, so be prepared to give some away.
Give it a go. You will love them.

Two-Hour Caramels
     --Adapted from KingArthurFlour.com

Ingredients:
  • 3 tablespoons vanilla extract (measured and set aside for the end)
  • 2 cups butter, cut into one-inch chunks
  • 4 cups half and half
  • 4 cups granulated sugar
  • 2 cups light brown sugar*
  • 2 cups light corn syrup
  • 2 teaspoons salt
  • 3 cups roasted unsalted almonds
Instructions:
  • Line a half-sheet pan (or two 9x13 inch pans) with parchment and spread almonds evenly over the bottom. Place parchment in another small dish, like an 8x8 inch pan or a pie plate--this is where you will pour the caramel you scrape from the pan. Place on a heat proof surface, like stove burners set to "off" or on a cooling rack. Also make sure you've measured your vanilla and set it aside where you can grab it once the caramel reaches temperature. 
  • Gather things you need to entertain you for the next two hours and/or make sure someone is home to spell you in case you need to use the restroom or just take a little break. You've been told.
  • Into a large heavy-bottomed stock pot (like an eight-quart stock pot), put the sugars, butter, half and half, corn syrup and salt. Place the pot on a burner set to medium-low heat. Stir with a silicone spatula taking care not to splash it around. When butter is melted clip a candy thermometer on the side and pull up a tall chair or stool.
  • Keep stirring gently for the next hour and a half to two hours until the caramel reaches exactly 246 degrees** Fahrenheit on the candy thermometer. Remove the thermometer, and then remove the pot from the heat and stir in vanilla extract. Carefully pour the screaming hot caramel over the almonds, which I need to tell you will shift at this time. Once most of the caramel has been poured from the pan, pour the last bit and scrape out the pan into the smaller parchment-lined pan you have ready.
  • Use your silicone spatula to make sure caramel gets to all corners of the pan. With oven-mitted hands, carefully lift and tap the pan of hot caramel to force air bubbles up and out. 
  • Allow caramel to cool for 30 to 60 minutes and then place in the refrigerator to cool completely if you want to cut it the same day. If you can let it cool/set overnight, then allow it to cool enough to loosely place some foil or a plastic sheet pan cover on the top--not completely sealed up, so any condensation will escape.
  • When caramel has completely set up and is firm, cut it up and wrap caramels individually in small pieces of wax paper.
  • I cut my caramels into 2 x 1/2 inch sticks, which is a nice sized piece, and I got 132 pieces. 
  • Makes about 10 dozen caramels
*The first time I made these I accidentally omitted the brown sugar completely and only added the 4 cups of white sugar with the other ingredients. I liked the caramel better because to me it had a more complex flavor, which I think was caused by the relative higher amount of salt. So this is the way I make the caramel now. I just leave out the brown sugar. Either way it's the best caramel you'll ever make.
 
**The original recipe calls for the caramel to be cooked to exactly 248 degrees Fahrenheit, but I've found with carryover cooking, if I bring it to 246, by the time I add the vanilla, stir it in, and pour the caramel into the pan, it gets to exactly the right temperature. When I cooked it to 248, I ended up with caramel that was just a tad too hard and would crack slightly upon cutting and biting. The 246 temp produces caramel that is firm, but still allows your teeth to sink in gently with absolutely no crunch.


Monday, December 24, 2012

"Candy Cane" Cookies

"Candy Cane" Cookies
Okay. It's time to blog about the legendary Candy Cane Cookie. First of all, don't let the name fool you: these cookies are not minty at all. Actually, they're barely even sweet. My mother-in-law usually makes these every Christmas, but this year I decided to take them on because I wanted to blog about them, and because I wanted to finally see what went into these cookies. Over the 22 years my husband and I have been together, I've eaten these cookies every Christmas we've lived near his mom. They're a bit of a joke to my husband, and, well, to the rest of us too. My sister-in-law has always loved them and I too now look forward to them each year. They taste like Christmas to me now. I can't say I recommend this recipe to most people, but if they interest you even after I describe them, then perhaps you might want to give them a try.
The Candy Cane Cookie is what I would call an oatmeal shortbread. As you can see, there's barely any sugar in the cookie itself, so most of the sweetness comes from the small bit of red icing on top. The texture varies from year to year, but when I made these today, they turned out nice and tender. Not soft, but easy to bite into and a bit on the dry side (that's the way I like them, though). They're somewhat buttery and the vanilla flavor really comes through. All in all, I'd say if you're a shortbread fan, and you're not big on sweets, these might be the cookie for you. If you do try them out, please let me know so that I can get an outsider's perspective on these odd little cookies that I have come to love.

"Candy Cane" Cookies

Ingredients:
Frosting:
  • 2 tablespoons butter, room temperature
  • 1 cup powdered sugar
  • 1/2 teaspoon vanilla extract
  • 1-2 tablespoons half and half or milk
  • red food coloring
Instructions:
Preheat oven to 325 degrees Fahrenheit. Line a baking sheet with parchment paper and set aside.
I large mixing bowl (or the bowl of a standing mixer fitted with a paddle attachment), cream the butter, powdered sugar, vanilla, and water. Add the oats, salt, and flour and mix just until completely combined.
Scoop about 2 tablespoons of dough into your hand and roll it like you would a wad of Playdough into a snake shape that is about 3 1/2 to 4 inches long. Place on prepared cookie sheet and form into a hook. Leave about 1 inch between candy canes. When pan is full, bake at 325 degrees for about 20-22 minutes, or until edges start to brown.
Remove from oven and move cookies to cooling rack to cool completely.

When cookie are cool, prepare frosting. In a small bowl, stir the butter, powdered sugar, vanilla, and 2 tablespoons of half and half/milk. Add more sugar or milk as needed to achieve a pipe-able consistency. Add food coloring and stir. Transfer to a piping bag fitted with a small round tip, or just transfer to a small zip-top baggie and snip away about 1/8 inch of a corner.
Pipe icing onto cookies, trying to make them look like candy canes with red stripes. As you can see, I didn't achieve perfection on mine.

Makes about 30 cookies.


Unbaked Candy Cane Cookie
Baked and unfrosted Candy Cane Cookie

Saturday, April 9, 2011

Tempering Chocolate

Refrigerator Cookies dipped in tempered chocolate
English Toffee dipped in tempered chocolate and almonds
So, I discovered a couple of years ago the secret of tempering chocolate.  I've seen chefs on TV use the inside of their lip, a thermometer, and marble slabs to accomplish this seeming tricky feat of the chocolate world.  I read someplace about how to temper much more simply and without taking the chocolate's temperature with a thermometer or my lip.  I'm always pleasantly surprised when my tempered chocolate firms up to a shiny, resilient, snappy shell.  It makes me feel like I'm working some sort of magic.
The tools for tempering chocolate are few and simple:

1. TASTY Chocolate--I prefer Dove Dark or Milk Chocolate Promises.  They are worth taking the time to unwrap.  If you're thinking about using the Hershey's Bliss, they're okay, but they definitely don't match the flavor and texture of the Dove chocolate.  I'm just saying.
2. A heavy saucepan filled half full of water.
3. A metal or glass bowl that fits atop your saucepan so that it just barely clears the water in the pan.
4. A bowl of ice that will accommodate the chocolate bowl.
5. A rubber spatula.
The materials for tempering chocolate.
Instructions:
1. Heat the water over medium-low to medium heat.
2. Start with chunks or chips of chocolate in the metal/glass bowl.  Place bowl on top of the sauce pan. You can let it sit for a few minutes and let it melt some before you start stirring.  Once you start stirring and the chocolate is about 3/4 melted, remove from heat and continue stirring until the chocolate is completely smooth and melted, with no chunks (even small ones) remaining.  If this is going too slowly, you can place the bowl over the hot water again for a minute or two.
3. When the chocolate is all melted, put the metal/glass bowl on top of the ice in its bowl.  Scrape and stir with the rubber spatula until you see chocolate freezing to the bottom and sides of the bowl, and the chocolate you're stirring starts to thicken to the point of canned frosting.
4.  Return the chocolate to the top of the pan of hot water and continue to stir until the chocolate is completely melted and loosened up to a liquid, about the consistency of a melted ice cream.  This takes less than a minute.
5.  Your chocolate is ready to be dipped in, molded, or piped.  If you're in the middle of dipping and you notice the chocolate getting too thick, return to the top of the pan of hot water and stir until liquid again.

It might take some practice to get it exactly right, but even if you do it wrong the first time, it's a learning experience, and you'll be that much closer to getting it right.  


Tuesday, April 5, 2011

Crisp Mini Chocolate Chip Cookies

"These are not the chocolate chip cookies you are looking for."
"Look how large I make my cookies!"
Sometimes I just like crisp chocolate chip cookies. This is a variation on my very favorite chocolate chip cookie recipe (My Favorite CCC Recipe). It leaves out the water and makes crisp cookies similar to the Pepperidge Farms Chesapeake Cookies or Famous Amos Cookies. I almost bought a bag of Nestle Tollhouse Morsels to make these, but I just couldn't do it. I can taste the difference and I wanted to enjoy the cookies if I was going to take the time to bake and photograph them. So, I cut up the Dove Promises, and I am pleased with the results.
As far as the mini size goes, I like being able to just pop a little cookie into my mouth without having to commit to holding onto a larger cookie for a couple of minutes. I'm a lazy cookie snob, I guess. I got the idea to make tiny cookies a loooong time ago, from a woman who came to our house one time to buy a computer or something from my computer salesman dad. I don't remember the exact circumstances because I was in high school, but I remember that the woman was of Indian descent and she brought over these teeny tiny chocolate chip cookies that were about as big around as a dime. Each cookie only had about two chips. Seriously, two chocolate chips per cookie. I kind of felt bad for the woman thinking she didn't understand how to make American chocolate chip cookies. Then I tasted the cookies and realized what a genius this gentle Indian cookie-baking woman was. I then went through an ity bitty cookie phase, which I had forgotten about until this week. 
Since I don't have the patience any more to make cookies the size of a dime, I enlarged mine to about the size of a quarter. Still plenty small, and still plenty delicious. Give 'em a try.


Crisp Mini Chocolate Chip Cookies
     --adapted from Top Secret Recipes by Todd Wilbur


Ingredients 

  • 3/4 cup butter, softened
  • 1/4 cup Crisco
  • 1 egg
  • 1 tsp vanilla extract
  • ¾ cup sugar
  • ¾ cup brown sugar 
  • ½ tsp baking powder
  • ½ tsp salt
  • ¾ tsp baking soda
  • 2 ½ cups King Arthur Unbleached All-Purpose Flour
  • 1 bag Dove Dark Chocolate Promises, unwrapped & cut into ¼-inch chunks
  • 1 ½ cups chopped lightly toasted pecans (optional)
Instructions
1. Cream butter, Crisco, egg, & vanilla in a medium size bowl. (This will take a little while for the wet ingredients to emulsify.)
2. In a large bowl, stir together with a whisk the sugars, baking soda, baking powder, salt, and flour.

3. Combine moist mixture with dry mixture just until it comes together (do not over mix).  Dough will be crumbly.  Add the chocolate chunks and pecans. Refrigerate dough two hours or over night.

4. Preheat oven to 350°F. Use a half-teaspoon measuring spoon to make tiny dough balls and place them three-quarters to one inch apart on a parchment lined cookie sheet.  
5. Bake 8-11 minutes, or until puffed and light brown around the edges.

Makes a lot of mini cookies.  I haven't counted.


See what I mean about crumbly dough?
My trusty IKEA half teaspoon forms the cookies.

Wednesday, March 30, 2011

Almond Butter Cookies

Perfect Almond Butter Cookies
Aunt Joan gave me some Rycraft cookie stamps for like my 16th or 17th birthday, and I still have them.  With the stamps came a recipe book for all kinds of shortbread.  This recipe is my favorite from that book, and when I make them for people, these always get rave reviews.  They are so simple, it's hard to believe they're so loved, but they have just the perfect amount of sweetness and their texture is perfectly melt-in-your-mouth crisp.  I like mine to be clearly browned on the edges in order to get the full flavor of this buttery cookie.

Almond Butter Cookies

Ingredients:
Instructions: 
Preheat oven to 350°. Cream butter & sugar.  Add extract.  Add salt & flour.  Chill dough.  Form one-inch balls & roll in sugar.  Stamp with cookie stamp.
Bake at 350° for 12-15 minutes, or until edges are lightly browned.
* These cookies are also great with ½ cup finely chopped macadamia nuts.

Makes about 3 dozen cookies.

Cookie stamps from Rycraft and Almond extract from Penzy's Spices


01 09