Showing posts with label Breads. Show all posts

Friday, July 17, 2026

Almond Flour Banana Bread

Almond Flour Banana Bread

I don't know that I have much to say about this banana bread except that I'm obsessed with it right now. There's no added fat/oil (until you slather butter on it before eating). It's higher in protein that banana bread made with wheat flour. It's gluten-free. It's really super delicious too. Great option if you have to be gluten/wheat-free.

Almond Flour Banana Bread
     Adapted from Mama Knows Gluten Free

Ingredients: 
  • 2 medium-large bananas
  • 1 teaspoon baking soda
  • 1/2 teaspoon baking powder 
  • 1/4 teaspoon salt
  • 1/2 cup granulated sugar
  • 2 large eggs
  • 1 teaspoon vanilla extract
  • 2 1/2 cups superfine blanched almond flour
Instructions:
  • Preheat oven to 350°Fahrenheit. Grease/butter one 9" x 5" loaf pan or two mini loaf pans (5 3/4" x 3 1/4"). 
  • In a large bowl mash the bananas until smooth. Add the baking soda, baking powder, and salt. Whisk until combined.
  • Add the eggs, vanilla extract, and granulated sugar. Whisk to combine.
  • Add the almond flour to the banana mixture. Use a silicone spatula to mix until thoroughly combined.
  • Pour/Scrape batter into prepared pan(s).
  • Bake on the center rack: single loaf for 50 minutes; 2 mini loaves for about 35 minutes--or until bread bounces back instead of denting upon pressing lightly on top.
  • Allow the bread to cool in the pan for 5 minutes. Run a sharp knife around the edge of the pan before turning out onto a wire rack to cool further. 
  • Slice with a serrated knife and enjoy.

Wrap leftovers in foil or plastic wrap.


Saturday, May 3, 2025

Liege Waffles

Liege Waffles


Liege Waffles: a buttery yeasted dough studded with Belgian pearl sugar and baked on a waffle iron. I've been wanting to taste these and make them for years. I finally tasted them maybe two years  ago(?) at waffle truck at a bar in Marietta, GA, on St. Patrick's Day. Then a trivia teammate shared with me ones she had made. That was the clincher. I had to make them--and here they finally are, in all their glory. The waffle dough isn't sweet at all, but the sugar pearls add just the right sweetness and crunch on the outside. 

Be sure to read the cleaning note at the end. These make a mess of your waffle iron. 

Shoutout to the blog Whipped for sharing the recipe.

Liege Waffles
Adapted from Whipped

Ingredients:
  • 2 cups all-purpose flour
  • 1 1/2 tablespoons white sugar
  • 1/8 teaspoon salt
  • 2 1/4 teaspoons instant yeast
  • 1/3 cup warm water
  • 3 eggs, room temperature
  • 1 cup butter, melted and cooled
  • 1 1/2 teaspoons vanilla extract
  • 1 cup Belgian pearl sugar
Instructions:
  • To the bowl of a stand mixer fitted with a paddle attachment, add the flour, sugar, salt, and yeast. Then stir ingredients with whisk to blend completely.
  • Add the water and mix on low. 
  • Add eggs, one at a time until they are all completely incorporated. Then mix in vanilla.
  • Slowly add the melted & cooled butter, scraping the sides of the bowl occasionally to make sure it's evenly mixed.
  • Tidy up the dough by scraping the sides with a silicone/rubber spatula.
  • Cover with a tea towel, plastic wrap, or a clean plastic grocery bag, and allow to sit and rise for about 1 hour.
  • Once dough has doubled, add the pearl sugar and fold it in gently, making sure to evenly distribute the pearls.
  • Allow dough to sit again for about 15 minutes. 
  • After dough has sat for 7-10 minutes, plug in your waffle iron (a Belgian style waffle iron is best for this because you get the thick waffles).
  • When the dough and waffle iron are ready, scoop 1/4 to 1/3 cup blobs of dough onto the hot waffle iron. Close and allow to cook until medium golden brown, or browned to your liking. My waffle iron has number settings, and I set mine to 3.5 out of 5. It beeps when they're perfectly browned. 
  • Use tongs or two forks to carefully move the cooked waffles to a cooling rack to cool. The sugar pearls have melted and you don't want to burn your fingers on the molten sugar.
  • Allow waffles to cool about 5 minutes before enjoying. Repeat waffle cooking until all dough is cooked.
  • Store uneaten cooled waffles in an airtight container in the fridge. You can also freeze these. Reheat by toasting on a light setting. 

Makes about 19 smaller waffles or 9-10 medium sized waffles

Re: Cleaning the waffle iron


While the waffle iron was still hot, I unplugged it and then I poured in water to cover the melted sugar and go up the sides about halfway.


After a few minutes I started using a paper towel held by my pair of mini-tongs to wipe it. I then used the same paper towel to soak up the water. I had to wring out the paper towel several times, but it was sturdier than I thought.


The waffle iron has never looked cleaner.


Friday, January 10, 2025

Sourdough Bagels


So many things are going on right now. I'm starting a new job next week and I'm going to be overlapping that with my current job for a few weeks. So, with my last two days off before a 9-day stretch with no day off, I decided to try my hand at sourdough bagels. I was already making sourdough loaves to have on hand in the freezer, and I had some extra ripe starter, so I looked up a recipe and found the perfect recipe on The Perfect Loaf. 

I really recommend looking at the recipe there, as they really do a great job explaining the recipe better than I did here, timeline and all. I tweaked the recipe a bit, so I decided to post it here mainly for myself to replicate in the future.

These bagels take a bit more time than the usual ones, but they are so much more satisfying. Today I made plain, Asiago, and everything bagels--all of them fantastic. 

If you are itching to try out sourdough bagels, give these a go. You will love them.

Sourdough Bagels
     Adapted from The Perfect Loaf

Ingredients:

Levain
  • 116 g bread flour
  • 65 g water
  • 30 g ripe sourdough starter
Bagel Dough
  • 850 g bread flour
  • 475 g water
  • 30 g white sugar
  • 30 g molasses or barley malt syrup
  • 18 g salt
  • 7 g non-diastatic malt powder
  • batch of levain (noted above)
Boiling and Topping
  • 3-4 quarts of water
  • 2 tablespoons rice flour (for boiling)
  • toppings, such as shredded Asiago cheese, everything bagel seasoning, poppy seeds, sesame seeds, etc.

Instructions:

The evening before you plan to mix the bagel dough, mix the levain in a wide-mouth pint size mason jar, or in a small bowl. This mixture will be quite stiff, but try to mix it completely. You and take it out of its container and kneed it, if that helps. Cover levain loosely and allow to ferment overnight (about 12 hours) in cozy location.

In the bowl of a sturdy stand mixer, mix about a quarter cup of the water with the sugar, molasses, malt powder, and salt. Add the ripe levain, remaining water, and the flour. Mix on low for about 5-6 minutes or until it looks relatively smooth and elastic. Transfer dough to a bowl or other proofing container. Loosely cover and allow to ferment until puffed, about 3-4 hours.

Note: Do not use bench flour when working with this dough. It should not be sticky enough for that.

Line a baking sheet with parchment paper.

Turn the dough out onto a clean counter and divide evenly into 12 pieces (I used my digital scale for this). At this point you can choose to shape the bagels one of two ways: rope or ball. I used the rope method, and today the bagels turned out a bit wonky. Once your bagels are formed place them on the prepared baking sheet.

When all are done, cover the baking sheet with a lid or a large plastic bag, and allow them to proof for 2-4 hours at room temperature. If they don't seem to puff at all, just put them in the fridge anyway after 3-4 hours. Leave in the fridge overnight.

When you're ready to boil and bake, preheat your convection oven to 475 degrees Fahrenheit (or 500 degrees F for non-convection). Line a couple of baking sheets with parchment and set aside.

Fill a wide-mouth pot or dutch oven about half full of water and bring to a boil. Add the rice flour and whisk to incorporate (this helps give the bagels a nice shine).

Boil bagels in batches of 3-4 for about 1 minute, turning each bagel at the half-minute mark. Using a spatula with holes, or other straining kitchen tool, scoop each bagel out, tap bottom of spatula on a kitchen towel to drain a bit, and slide bagel onto the prepared baking sheet. Immediately top with toppings that you want to stick. Continue with remaining bagels, placing about 6-8 bagels on each pan, making sure to not crowd them if you don't want them to touch.

Bake bagels at 475 for about 7 minutes, and then turn oven down to 450 to bake another 6-7 minutes, or until they are deep golden brown. Carefully transfer bagels to a cooling rack to cool at least 10 minutes before enjoying. (Note: I used a baking steel and baking stone and slid the bagels onto the stone/steel on the parchment, and this produced nice crisp exteriors. I you don't have either of those items, baking the bagels on the baking sheets will be just fine.)


Thursday, October 19, 2023

Ciabatta Rolls

Ciabatta Rolls


So, I started this post about eight years ago, and I cannot recall why I didn't finish it then. I didn't completely finish it today either. I just want to get the recipe posted because I think I'll be making it again. Perhaps there are other bread people out there who might be up for it as well. And perhaps I'll even make these again soon so I can take more pics or even make a TikTok about it. We shall see.
For now, this is what I have. 
There are so many things I love about these rolls, I don't know why I forgot about them. They're light, flavorful, versatile, and such a great sensory experience to make. The dough gets super puffy and jiggly (see video clip at the bottom), and they're delicious.
This week I used one of these for a fantastic breakfast sandwich with Black Forest ham, egg, and American cheese. Mmm. Super satisfying. The rest are waiting in the freezer for my nephews who visit next month, but I think I may try to bake some more because I'll want to eat and share these with Ezra AND I want to add more pics here.
Okay, enough rambling. Back to baking.


Ciabatta Rolls
    --adapted from Cook's Illustrated


Ingredients:

Biga
Dough

Instructions:
1. FOR THE BIGA: Combine flour, yeast, and water in medium bowl and stir with wooden spoon until uniform mass forms, about 1 minute. Cover bowl with plastic wrap and let stand at room temperature (about 70 degrees) overnight (at least 8 hours and up to 24 hours).
2. FOR THE DOUGH: Place biga and dough ingredients in bowl of stand mixer fitted with paddle attachment. Mix on lowest speed until roughly combined and shaggy dough forms, about 1 minute; scrape down sides of bowl as necessary. Continue mixing on medium-low speed until dough becomes uniform mass that collects on paddle and pulls away from sides of bowl, 4 to 6 minutes. Change to dough hook and knead bread on medium speed until smooth and shiny (dough will be very sticky), about 10 minutes. Transfer dough to large bowl and cover tightly with plastic wrap. Let dough rise at room temperature until doubled in volume, about 1 hour.*
3. Spray silicone spatula or bowl scraper with nonstick cooking spray; fold partially risen dough over itself by gently lifting and folding edge of dough toward middle. Turn bowl 90 degrees; fold again. Turn bowl and fold dough six more times (total of eight turns). Cover with plastic wrap and let rise for 30 minutes. Repeat folding, replace plastic wrap, and let rise until doubled in volume, about 30 minutes longer. Meanwhile, adjust oven rack to lower-middle position, place baking stone on rack, and heat oven to 450 degrees at least 30 minutes before baking.
4. Line two rimless baking sheets (or the underside of a baking sheet)** with parchment paper Transfer dough to liberally floured counter, being careful not to deflate completely. Liberally flour top of dough and divide in half. Adjust each piece of dough so cut side is facing up and dust with flour. Cut each half again in half along the length of the dough. Working with one fourth of the dough at a time, cut each strip into thirds (you will end up with 12 rolls in the end). 
With well-floured hands, take each piece of dough and press with your fingertips to stretch dough to a rough 3x5 inch rectangle. Fold rectangle into thirds and gently press the seam on the long side. Roll in a little bit of flour to prevent sticking. Place on parchment lined baking sheet. Repeat with remaining dough until you have six little loaves on each parchment lined baking sheet. Cover loosely with plastic wrap. Let loaves sit at room temperature for 30 minutes (surfaces of loaves will develop small bubbles).
5. After this last rise, place one of the pans in the fridge while you bake the other. Using floured fingertips, evenly poke entire surface of each roll. Spray loaves lightly with water. Carefully slide parchment with loaves onto baking stone using jerking motion. Bake at 450 degrees, spraying loaves with water twice more during first 5 minutes of baking time, until crust is deep golden brown and instant-read thermometer inserted into centers of loaves registers 210 degrees, 14-18 minutes. Transfer to wire rack, discard parchment, and cool loaves to room temperature, about 1 hour, before slicing and serving. Repeat with the other pan that's waiting in the fridge.

Makes 12 large rolls

** I use a baking stone in my oven, and it's always in there. If you do not have a baking stone, just bake the rolls on a parchment lined baking sheet and ignore all of the instructions to slide the rolls onto the bakig stone. Just put the baking sheets in the oven to bake.

*It's kind of tricky to keep track of the steps of dough development, so here's a summary/check list:
  • Prepare biga the night/day before.
  • Mix dough.
  • Let dough rise 60 minutes.
  • Fold dough 8 turns with greased spatula. 
  • Let dough rise 30 minutes. 
  • Fold 8 turns again .
  • Let dough rise 30 minutes.
  • Preheat oven.
  • Form loaves. 
  • Loaves rise 30 minutes. 
  • Poke loaves with fingertips.
  • Spray with water 
  • Bake 14-18 minutes.


Monday, May 8, 2023

Banana Nut Bread II


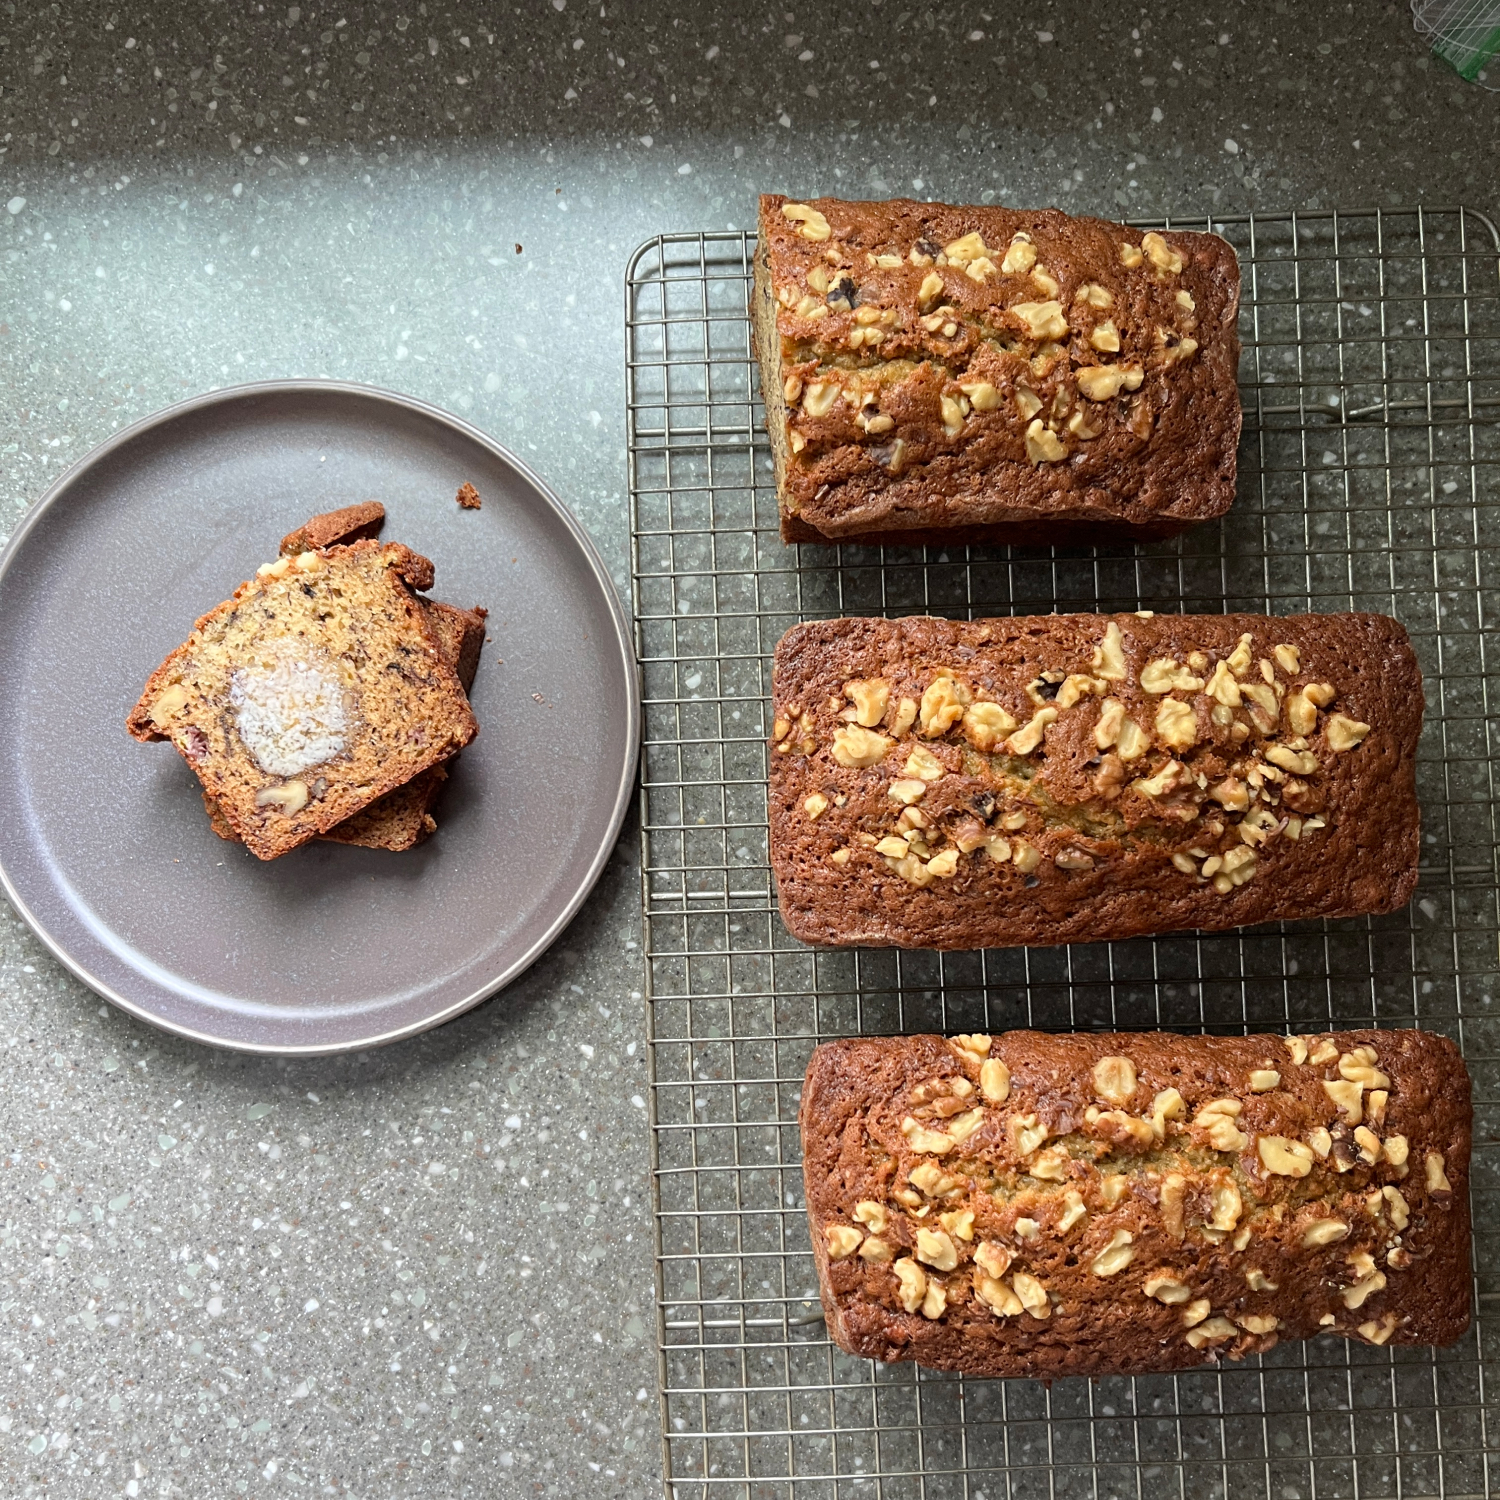
Somehow I ended up with loads of super ripe bananas in my kitchen this weekend, so I decided to take my favorite pumpkin bread recipe and modify it for bananas. Since the bananas were so ripe and sweet, I cut back on the sugar, and I also cut back on the water in the recipe because it seemed like the original 2/3 cup would be too much. I subbed vanilla for the fall spices, and you know what? This is now my favorite banana bread recipe.
I don't know if it's the combination of white and brown sugar, or just the balance of all the ingredients, but this is just a good, solid, sweet banana bread. 
Feel free to leave the nuts out if it's not your thing. It will be just as delicious.

Banana Nut Bread II


INGREDIENTS 
  • 15 oz mashed (very) ripe banana (I actually weighed mine)
  • 4 eggs, room temperature
  • 1 cup vegetable oil
  • 1/2 cup water
  • 1 1/4 cups white sugar
  • 1 1/4 cups light brown sugar
  • 3 1/2 cups King Arthur Unbleached All-Purpose Flour
  • 2 teaspoons baking soda
  • 1 1/2 teaspoons salt
  • 2 teaspoons vanilla extract
  • 1 1/2 cups chopped walnuts
INSTRUCTIONS
  • Preheat oven to 350 degrees F (175 degrees C). 
  • Butter and flour three 7x3 inch loaf pans.
  • In a large bowl, mix together mashed banana, eggs, oil, water, vanilla and sugars until well blended. 
  • In a separate bowl, whisk together the flour, baking soda, and salt. 
  • Stir the dry ingredients into the banana mixture until just blended. 
  • Fold in the nuts.  
  • Pour into the prepared pans.
  • Bake for about 50-60 minutes in the preheated oven. 
  • Loaves are done when toothpick inserted in center comes out clean.  
  • Wrap tightly in aluminum foil and freeze what you won't eat in two days.

Makes three medium loaves

My pan must not have been level.


Sunday, August 1, 2021

Babka (Two Kinds: Chocolate and Pecan Cinnamon)

Chocolate Babka

Pecan Cinnamon Babka

Twice the Babka awesomeness

I've been seeing lots of posts on Instagram of people making babka, or at least making breads using the technique of slicing a rolled log of dough lengthwise and twisting. And since this seems to be a summer of baking and blogging, AND since I purchased another pair of 7" x 3" loaf pans, I decided it was time I tried my hand at babka, even though I've never tasted it before now.

If you want a more straightforward recipe that does not involve making small loaves of two different kinds of babka, you may want to look at the recipes from Food & Wine and Butternut Bakery linked here. I'm just going to describe what I did because it's all I know.

What is produced from the recipe below is even more delightful than I expected. Crisp on the outside, soft and buttery on the inside bread with such flavorful fillings that made my mouth and my tummy very happy. I think I like the pecan cinnamon version slightly better because it develops this super tasty, chewy, caremely crust. The pecan flavor really stands out as I cut the amount of cinnamon in half, and it is just so, so good. I can't even do it justice with words. You just have to try it.

I've said too much already. If you've never made or eaten babka before, I think this is a solid recipe. If you're used to baking, you can probably adjust pan sizes to fit what you have at home. I think if you have standard size loaf pans, you could used these same amounts and just end up with one loaf of each kind.

Go ahead and do it. You know you want to.


Babka
Adapted from Food & Wine and Butternut Bakery

Bread Ingredients:
  • 4 cups King Arthur All Purpose Flour
  • 1/3 cup plus 2 tablespoons sugar
  • 1 teaspoons fine sea salt
  • 1 cup milk
  • 2 1/4 teaspoon instant yeast
  • 1 large egg plus 1 large egg yolk
  • 10 tablespoons butter (salted) cut into tablespoons, room temperature
Chocolate Filling Ingredients:
  • 4.5 ounces milk chocolate, finely chopped (I used 13 Dove Milk Chocolate Promises)
  • 1.5 ounces dark chocolate, finely chopped (I used 4 Dove Dark Chocolate Promises)
  • 6 tablespoons butter
  • 3/4 cup finely ground chocolate wafer cookies (I used Oreos w/ filling scraped out)
  • 1.5 tablespoons honey
Pecan Cinnamon Ingredients:
  • 4 tablespoons butter, room temperature
  • 2 tablespoons light corn syrup
  • 1/2 cup brown sugar
  • 1 teaspoon cinnamon
  • 1 cup crushed toasted pecans
Chocolate Glaze Ingredients:
  • 6 ounces semisweet chocolate, finely chopped (I used 18 Dove Dark Chocolate Promises)
  • 2 ounces milk chocolate, finely chopped (I used 6 Dove Milk Chocolate Promises)
  • 6 tablespoons butter, cut into chunks
  • 1 tablespoon light corn syrup
Instructions for Dough:
  • In the bowl of a stand mixer, whisk together the flour, sugar, salt, and yeast.
  • In a small bowl or liquid measuring cup, whisk together the milk, egg, and egg yolk.
  • Using the dough hook attachment, mix at low speed until ingredients are incorporated. Then turn to medium and mix until dough is smooth, about 5 minutes.
  • Add all of the butter and mix on low speed until butter in completely incorporated. Stop the mixer and scrape the sides down the sides as needed during mixing. Continue mixing until you have a uniform "tacky dough."
  • Line a baking sheet with parchment paper and then spray with non-stick cooking spray.
  • Divide dough in half, and form each half into a flat square, about 3/4 to 1 inch in thickness.
  • Cover with plastic wrap and refrigerate overnight.
Instructions for the Chocolate Filling:
  • In the top of a double boiler, melt the chopped chocolates with the butter. Stir occasionally until smooth and then allow to cool to room temperature.
  • Once cooled, stir in ground cookies and honey.
Instructions for the Pecan Cinnamon Filling:
  • Stir together all ingredients in a small bowl.
Assembling the Babka:
  • Line 4 loaf pans (7" x 3") with parchment paper (see photo below). Then butter the parchment paper with a thin layer of butter. Set aside.
  • Remove dough squares from the refrigerator, and on a surface lightly greased with vegetable oil, roll out one of the dough squares to a rectangle approximately 11" x  20".
  • Spread one of the fillings evenly over the surface of the dough using an offset spatula. Leave a margin on one of the long sides of about 1/4 inch.
  • Using the edge of a bench scraper if necessary, roll the dough lengthwise fairly tightly. Press gently to seal the end once you're done rolling.
  • Cut the dough log into two equal logs.
  • Cut each of the shorter logs in half lengthwise.
  • Flip one of the halves so that you have one narrow end and one wide end for each of the loaf ends (see pics below).
  • Carefully twist the two halves keeping the cut sides up.
  • Place the twisted loaf into a prepared pan and then repeat with the other half log.
  • Cover with plastic wrap and allow to rise until puffed, but not necessarily doubled, about 2 hours.
  • Repeat with the other dough square and prepared filling.
Baking the Babka:
  • While loaves rise, preheat the oven to 365 degrees Fahrenheit (I combined two different recipes, so I somewhat averaged the recommended temps).
  • When loaves have risen, bake at 365 degrees for about 38-42 minutes, or until well browned and springy to the touch on top.
  • Remove from oven and cool on a wire rack in the loaf pans for about 5 minutes before removing the bread from the pans using the parchment lining to lift the loaves up and out.
  • Allow loaves to cool completely on a wire cooling rack.

Instructions for the Chocolate Babka Glaze:
  • In a double boiler, melt the chopped chocolates with the butter. Stir until smooth and then stir in the corn syrup. 
  • Spoon the glaze evenly over the cooled chocolate babka loaves.
  • Allow chocolate to set before cutting the chocolate babka. This will take 30-60 minutes.

Once babkas are cooled and set, you can slice and eat.

Store uneaten babka in a sealed bag or container, freezing leftovers you do not plan to eat within two days.

Makes 4 small loaves


This is such an involved recipe, I have way too many pics. These are just a few. Click on this link to see a video of how the folks at Food and Wine made the chocolate Babka. They formed it differently than I did, but it's a good way to see much of the process.

3" x 7" on the left & 4" x 8.25" (standard) on right


Scrumptious pecan cinnamon Babka

Delicious chocolate Babka


01 09