Showing posts with label Breakfast. Show all posts

Friday, July 17, 2026

Almond Flour Banana Bread

Almond Flour Banana Bread

I don't know that I have much to say about this banana bread except that I'm obsessed with it right now. There's no added fat/oil (until you slather butter on it before eating). It's higher in protein that banana bread made with wheat flour. It's gluten-free. It's really super delicious too. Great option if you have to be gluten/wheat-free.

Almond Flour Banana Bread
     Adapted from Mama Knows Gluten Free

Ingredients: 
  • 2 medium-large bananas
  • 1 teaspoon baking soda
  • 1/2 teaspoon baking powder 
  • 1/4 teaspoon salt
  • 1/2 cup granulated sugar
  • 2 large eggs
  • 1 teaspoon vanilla extract
  • 2 1/2 cups superfine blanched almond flour
Instructions:
  • Preheat oven to 350°Fahrenheit. Grease/butter one 9" x 5" loaf pan or two mini loaf pans (5 3/4" x 3 1/4"). 
  • In a large bowl mash the bananas until smooth. Add the baking soda, baking powder, and salt. Whisk until combined.
  • Add the eggs, vanilla extract, and granulated sugar. Whisk to combine.
  • Add the almond flour to the banana mixture. Use a silicone spatula to mix until thoroughly combined.
  • Pour/Scrape batter into prepared pan(s).
  • Bake on the center rack: single loaf for 50 minutes; 2 mini loaves for about 35 minutes--or until bread bounces back instead of denting upon pressing lightly on top.
  • Allow the bread to cool in the pan for 5 minutes. Run a sharp knife around the edge of the pan before turning out onto a wire rack to cool further. 
  • Slice with a serrated knife and enjoy.

Wrap leftovers in foil or plastic wrap.


Saturday, May 3, 2025

Liege Waffles

Liege Waffles


Liege Waffles: a buttery yeasted dough studded with Belgian pearl sugar and baked on a waffle iron. I've been wanting to taste these and make them for years. I finally tasted them maybe two years  ago(?) at waffle truck at a bar in Marietta, GA, on St. Patrick's Day. Then a trivia teammate shared with me ones she had made. That was the clincher. I had to make them--and here they finally are, in all their glory. The waffle dough isn't sweet at all, but the sugar pearls add just the right sweetness and crunch on the outside. 

Be sure to read the cleaning note at the end. These make a mess of your waffle iron. 

Shoutout to the blog Whipped for sharing the recipe.

Liege Waffles
Adapted from Whipped

Ingredients:
  • 2 cups all-purpose flour
  • 1 1/2 tablespoons white sugar
  • 1/8 teaspoon salt
  • 2 1/4 teaspoons instant yeast
  • 1/3 cup warm water
  • 3 eggs, room temperature
  • 1 cup butter, melted and cooled
  • 1 1/2 teaspoons vanilla extract
  • 1 cup Belgian pearl sugar
Instructions:
  • To the bowl of a stand mixer fitted with a paddle attachment, add the flour, sugar, salt, and yeast. Then stir ingredients with whisk to blend completely.
  • Add the water and mix on low. 
  • Add eggs, one at a time until they are all completely incorporated. Then mix in vanilla.
  • Slowly add the melted & cooled butter, scraping the sides of the bowl occasionally to make sure it's evenly mixed.
  • Tidy up the dough by scraping the sides with a silicone/rubber spatula.
  • Cover with a tea towel, plastic wrap, or a clean plastic grocery bag, and allow to sit and rise for about 1 hour.
  • Once dough has doubled, add the pearl sugar and fold it in gently, making sure to evenly distribute the pearls.
  • Allow dough to sit again for about 15 minutes. 
  • After dough has sat for 7-10 minutes, plug in your waffle iron (a Belgian style waffle iron is best for this because you get the thick waffles).
  • When the dough and waffle iron are ready, scoop 1/4 to 1/3 cup blobs of dough onto the hot waffle iron. Close and allow to cook until medium golden brown, or browned to your liking. My waffle iron has number settings, and I set mine to 3.5 out of 5. It beeps when they're perfectly browned. 
  • Use tongs or two forks to carefully move the cooked waffles to a cooling rack to cool. The sugar pearls have melted and you don't want to burn your fingers on the molten sugar.
  • Allow waffles to cool about 5 minutes before enjoying. Repeat waffle cooking until all dough is cooked.
  • Store uneaten cooled waffles in an airtight container in the fridge. You can also freeze these. Reheat by toasting on a light setting. 

Makes about 19 smaller waffles or 9-10 medium sized waffles

Re: Cleaning the waffle iron


While the waffle iron was still hot, I unplugged it and then I poured in water to cover the melted sugar and go up the sides about halfway.


After a few minutes I started using a paper towel held by my pair of mini-tongs to wipe it. I then used the same paper towel to soak up the water. I had to wring out the paper towel several times, but it was sturdier than I thought.


The waffle iron has never looked cleaner.


Saturday, April 6, 2024

Soft Cheese Crackers from Scratch


Marilyn's Cheese Crackers from Scratch


These little gems are a family favorite. They're rich, salty, cheesy. Mmm. They're kind of like a cheese cookie, if that makes sense. Crisp on the edges, soft and chewy in the middle. We usually make them using a small jar of Kraft Old English Sharp Cheddar Cheese Spread, but I since it's really just made of cheddar cheese, I thought I'd try using some block Cabot sharp cheddar I have in my fridge. And it worked beautifully. Same gorgeous results without any preservatives. 

These are great for a decadent breakfast or brunch treat, afternoon snack, or appetizers for a party. 

Heads up, this recipe requires a food processor. No way around that.

(Click here for original recipe with the Kraft jarred cheese spread.)

Marilyn's Cheese Crackers from Scratch

Ingredients:
  • 5 ounces quality sharp cheddar cheese, grated
  • 1/4 cup butter, softened
  • 1/4 teaspoon salt
  • 1/2 cup all purpose flour
Instructions:
  • Preheat oven to 400 degrees Fahrenheit, and line a baking sheet with parchment paper and set aside.
  • Place grated cheese in the bowl of a food processor and process until nearly a paste. It probably won't completely turn to paste, but will sort of bunch up into a sort of dry cottage cheese texture. 
  • Add the butter and salt, and process until smooth.
  • Add flour, pulse a few times and then process until flour is incorporated. 
  • Remove blade, carefully scraping off any dough and then incorporate any flour or cheese left of sides of bowl.
  • Make balls using about 1 1/2 to 2 teaspoons of dough and place at least 2 inches apart on baking sheet.
  • Bake at 400 degrees for 11-12 minutes or until puffed and well browned on edges.
  • Allow to cool 5 minutes or so before eating.
  • Store any leftovers in an airtight container and consume within 1 day.

Makes 20 crackers


Cheese, butter and salt processed smooth

After mixing in flour

I scooped dough with cookie scoop before rolling smooth


Almost like a cheesy macaron


Saturday, September 23, 2023

Mixed Berry Muffins


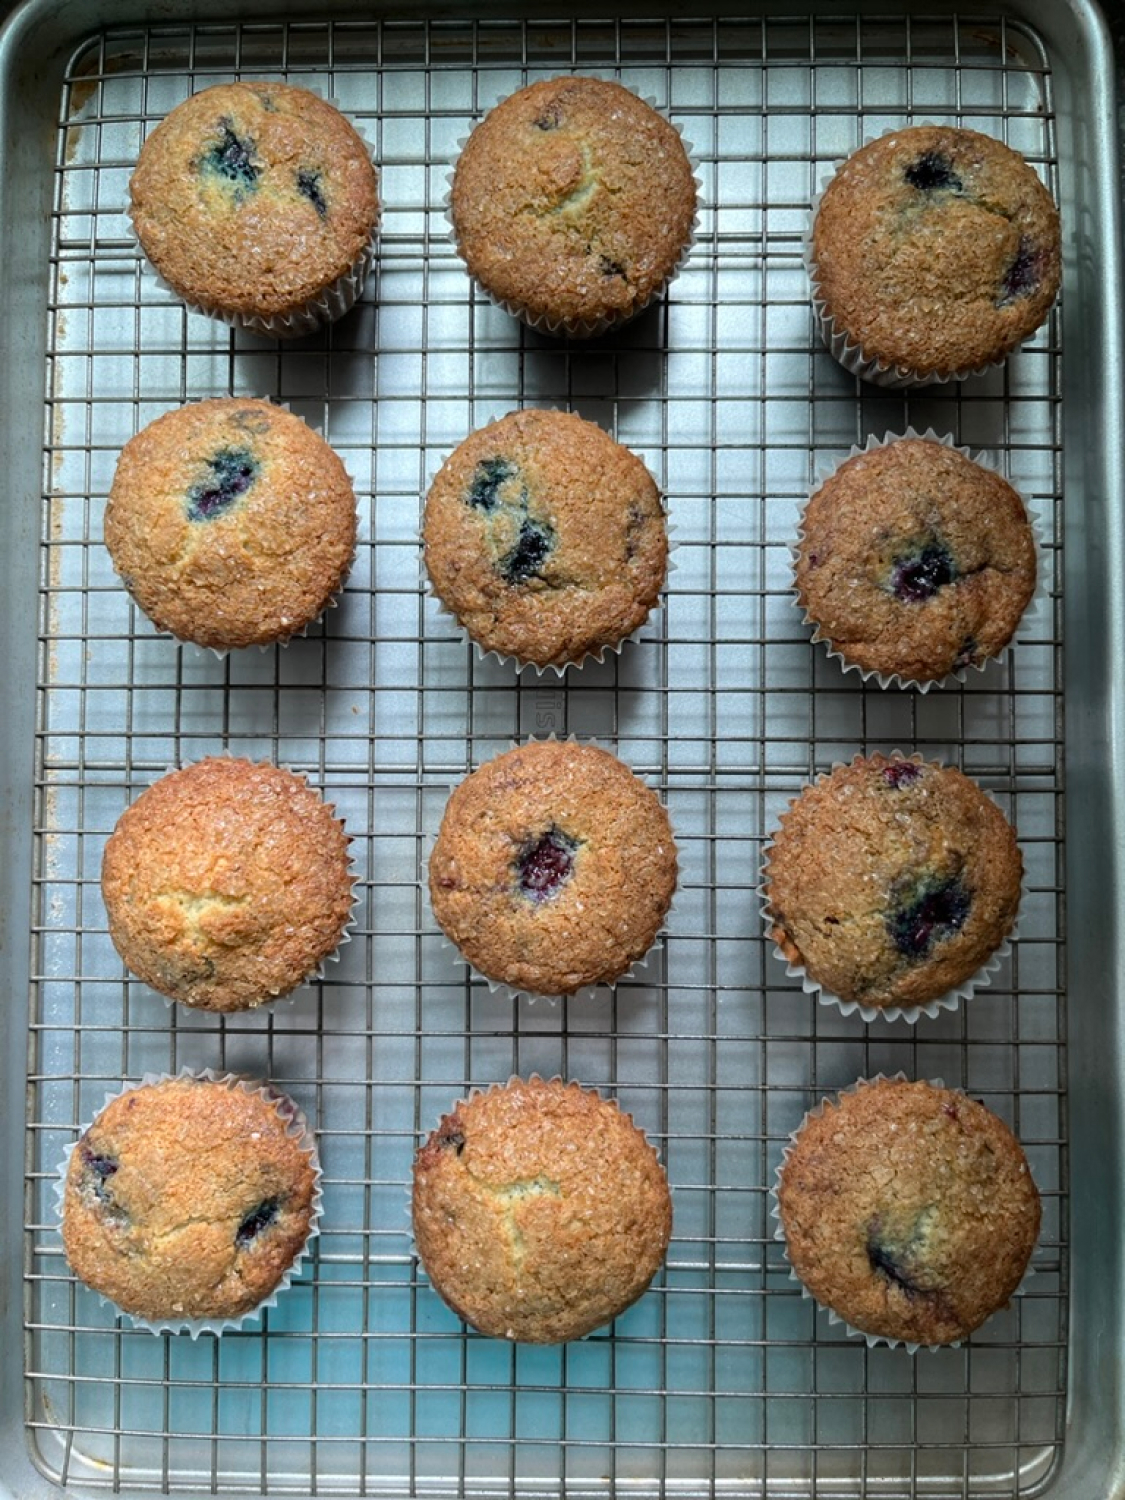
Oh my goodness. Claire Saffitz has done it again: given me a recipe I will cherish forever. Her most recent video was of her and her mom baking blueberry muffins. I only had frozen mixed berries on hand, so that's what I used. These are the kind of muffins that really taste more like cake than muffin, but that's fine with me. I think I like the mixed berries more than I would just blueberries because the raspberries and black berries add just a touch of tartness. These ones are actually my second attempt in two days. 


Mixed Berry Muffins

Adapted from Claire Saffitz x Dessert Person YouTube


Ingredients:

  • 1 stick butter, softened
  • 1/2 cup sugar
  • 1 egg (room temperature)
  • 1 teaspoon lemon zest
  • 1 cup + 1 Tablespoon all-purpose flour
  • 1 tsp baking powder
  • 1/2 teaspoon baking soda 
  • 1/2 teaspoon kosher salt (Diamond Crystal; if using Morton's use 1/4 teaspoon)
  • 1/2 cup sour cream (or plain yogurt)
  • 1/2 teaspoon vanilla
  • 1 cup frozen berries (blueberries, raspberries, black berries, mixed...)
  • 1-2 tablespoons demerara sugar

Instructions:

  • Preheat oven to 375 degrees Fahrenheit.
  • Line a muffin pan with paper liners.
  • Leave the berries in the freezer until they are called for in the recipe.
  • In a small bowl, whisk together the flour, salt, baking soda, and baking powder. Set aside. 
  • In a medium mixing bowl, whisk together the butter and sugar until lighter in color. (You can also use a stand or hand mixer, but today I used a whisk.)
  • Whisk in the egg, and then whisk in the lemon zest.
  • Make a little divot in the sour cream/yogurt and pour in the vanilla.
  • Using a silicone spatula, stir a third of the dry ingredient mixture into the butter/sugar/egg mixture.
  • Then stir in half of the sour cream/yogurt/vanilla.
  • Stir in another third of the dry ingredients.
  • Stir in the remaining sour cream/yogurt/vanilla.
  • Then stir in the remaining dry ingredients.
  • Gently fold in the frozen berries. You'll notice the batter gets thicker because the berries are bringing the temperature down.
  • Evenly divide the batter into the 12 muffin cups (I used a large-ish cookie scoop).
  • Sprinkle the tops of the muffins with the demerara sugar.
  • Place pan in the preheated oven and bake at 375 degrees for 20-24 minutes, or until golden brown on top (mine baked a little too long today).
  • Remove pan from oven and then carefully remove the muffins from the pan to finish cooling on a wire rack. 

Makes 12 muffins


I used a whisk today instead of my stand mixer and it worked great.
This is just the butter and sugar at this point.

Make sure the berries are really frozen when you stir them into the batter.


Sunday, July 9, 2023

Homemade Pop Tarts

Homemade Sour Cherry Pop Tarts


I think my quest to make homemade pop tarts began when my [imaginary] friendship with Claire Saffitz began. This was when I discovered Claire's videos on the Bon Appetit YouTube channel, and she made an episode on making gourmet Pop Tarts.
The strawberry pop tarts I made using that recipe actually turned out strange and greasy. I must have done something wrong because Claire's didn't look like that. They looked precise, flaky, and perfect. Mine, not so much. 
Then a month ago I went to breakfast with some friends and had the restaurant's homemade key lime pop tart, and that was also quite greasy, and frankly, not tasty.
Since I had so much sour cherry jam on my hands because of my front yard cherry tree's excessive production this year, I thought I'd try making pop tarts again, but with a more "traditional" pop tart crust, like the ones we get in the blue box. 
In Jennie's Kitchen had just what I was looking for: kind of a dry, tender crust. The original recipe calls for twice the amount of powdered sugar you see below, but I'm more of a savory person, so I did what you see. If you like more sweetness, go for the full 60 grams of powdered sugar.
This recipe calls for a food processor, but I'm sure it would work by hand using a pastry blender and some elbow grease. 
What I have ended up with are fantastic pop tarts that are getting rave reviews from friends and colleagues. Hopefully I'll be posting more variations soon, along with a TikTok. I actually recorded videos for the TikTok but broke the process up too much and realized I need to not do that. 
At any rate, if you're hankering to make your own pop tarts, try this recipe out. I think you'll be pleased.
Note: I've included my TikTok video showing my Pop Tart making process at the end of the recipe below.

Pop Tarts

     --Adapted from InJenniesKitchen.com

The Crust

Ingredients:
  • 200 grams all-purpose flour, plus more for dusting
  • 32 grams cornstarch
  • 30 grams powdered sugar
  • 1/2 teaspoon salt
  • 1/8 teaspoon baking soda
  • 1/4 teaspoon baking powder
  • 56 grams cold butter, cut into 8 pieces
  • 90 milliliters cream
Instructions:
  • In the bowl of a food processor, combine the flour, cornstarch, powdered sugar, salt, baking soda, and baking powder. Pulse a few times to blend the dry ingredients.
  • Add the butter and pulse a few more times until you get a sandy-looking mixture with possibly a few small chunks of butter left.
  • Pour in the cream and pulse a few times to disperse the cream. Then process for 30 to 60 seconds until the dough comes together and starts forming a ball, or at least cohesive chunks.
  • Get a square piece of plastic wrap and set aside (you'll need two pieces of plastic wrap total).
  • Weigh the dough and then divide into two equal portions.
  • Working with one half of the dough at a time on the plastic wrap, pat into a ball, and then flatten the sides of the ball to sort of form a dough cube.
  • Flatten the cube while trying to maintain the square shape as much as possible. 
  • Once it's about 1/2 inch thick, place onto the plastic wrap and try to neatly fold the dough into the plastic wrap so you get squared off corners with the plastic wrap.
  • Gently use a rolling pin to roll the dough in the plastic wrap so the dough squishes into the corners. It probably won't create a perfect square, but the more square you can get it now, the easier the rolling will be later.
  • Repeat with the other half of the dough.
  • Place dough in the refrigerator for about an hour, or up to 2 days.

The Pop Tarts

Ingredients:
  • 1 batch (in 2 pieces) pop tart dough (see above)
  • 3/4 to 1 cup fruit jam
  • 90 grams powdered sugar
  • 3-4 teaspoons water, plus more for sealing pop tarts
  • food color (optional)
  • sprinkles (optional)
Equipment:
  • baking sheet
  • parchment paper 
  • rolling pin
  • stiff ruler, plastic or metal
  • pizza cutter
  • fork
  • knife or offset spatula
  • small pastry brush
  • whisk

Instructions:
  • Remove the dough from the refrigerator and allow to sit at room temperature 5-10 minutes.
  • Preheat oven to 375 degrees Fahrenheit, and line a baking sheet with parchment paper.
  • Lightly dust your rolling surface with flour, and turn out one of your dough pieces. Flour your rolling pin and gently swat the dough to soften it up--tap a few times in each direction side to side, top to bottom, and diagonally both ways. Turn the dough over and swat it on that side too.
  • Start rolling the dough out into a rectangle and about 1/8" or 2 mm thickness, keeping the corners as square as possible. If the dough is cracking a lot, let it sit a few more minutes to soften before continuing to roll.
  • Using the ruler and the pizza cutter, cut the edges of the dough to make a clean-looking rectangle, preserving as much area as possible. You can bake off the scraps later or throw them away.
  • Measure the height and width of the sheet of dough and divide by 3. Then cut into 9 rectangles that are as equally sized as possible. Move the rectangles to the parchment-lined baking sheet and set aside.
  • Repeat the swatting and rolling with the second piece of dough, going just a little bit thinner to make a slightly larger rectangle. Repeat the measuring and cutting as well.
  • Using a floured fork, carefully poke holes into each piece of top crust.
  • Get your fruit jam, and using a spoon or offset spatula, spread about 2 to 3 teaspoons of jam onto the pieces of dough on the pan. Leave at least a quarter inch around the edge clear of jam. Repeat with remaining bottom crusts.
  • Using the pastry brush and water, lightly moisten the edges of dough around the jam. 
  • Place a top crust onto each of the bottom ones, gently pressing the edges together, taking care not to squeeze out any jam. Once you've done this with all of the pop tarts, dip a fork in flour and crimp all of the edges of each pop tart.
  • Bake at 375 degrees for 15-17 minutes, or until edges are starting to brown.
  • Move pop tarts to a wire rack to cool completely.
  • Once pop tarts are completely cool, whisk the 90 grams powdered sugar with 3 teaspoons water. Add the last teaspoon of water if the mixture is too thick and/or dry. This mixture should not be runny. Whisk in food coloring, if desired.
  • Using an offset spatula or a knife, spread about a teaspoon of frosting onto each pop tart and then immediately apply sprinkles, if desired. 
  • Allow frosting to set before enjoying.
  • Eat or freeze within 3 days.
  • Only toast the pop tarts if you do not frost them. This frosting will burn in a toaster.

Makes 9 pop tarts


Monday, May 8, 2023

Banana Nut Bread II


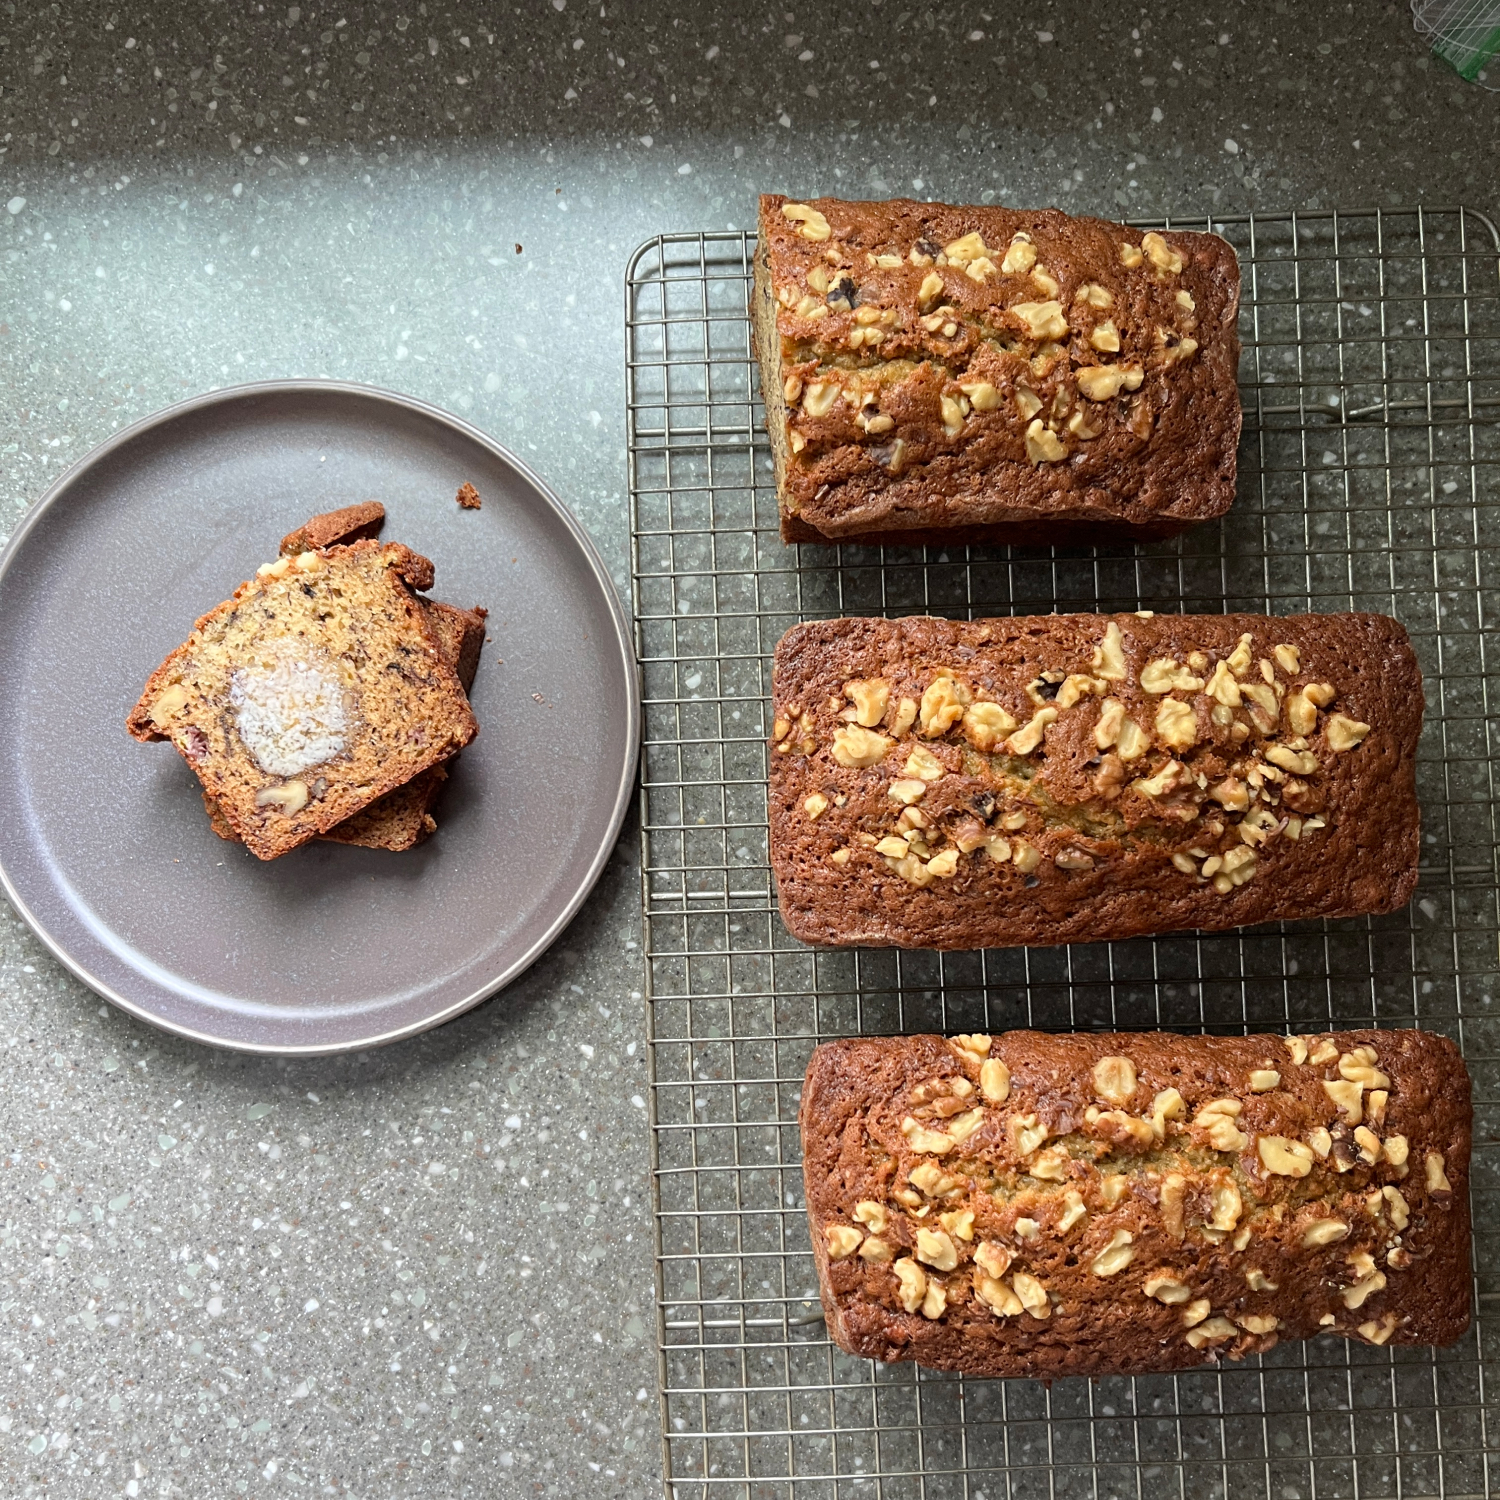
Somehow I ended up with loads of super ripe bananas in my kitchen this weekend, so I decided to take my favorite pumpkin bread recipe and modify it for bananas. Since the bananas were so ripe and sweet, I cut back on the sugar, and I also cut back on the water in the recipe because it seemed like the original 2/3 cup would be too much. I subbed vanilla for the fall spices, and you know what? This is now my favorite banana bread recipe.
I don't know if it's the combination of white and brown sugar, or just the balance of all the ingredients, but this is just a good, solid, sweet banana bread. 
Feel free to leave the nuts out if it's not your thing. It will be just as delicious.

Banana Nut Bread II


INGREDIENTS 
  • 15 oz mashed (very) ripe banana (I actually weighed mine)
  • 4 eggs, room temperature
  • 1 cup vegetable oil
  • 1/2 cup water
  • 1 1/4 cups white sugar
  • 1 1/4 cups light brown sugar
  • 3 1/2 cups King Arthur Unbleached All-Purpose Flour
  • 2 teaspoons baking soda
  • 1 1/2 teaspoons salt
  • 2 teaspoons vanilla extract
  • 1 1/2 cups chopped walnuts
INSTRUCTIONS
  • Preheat oven to 350 degrees F (175 degrees C). 
  • Butter and flour three 7x3 inch loaf pans.
  • In a large bowl, mix together mashed banana, eggs, oil, water, vanilla and sugars until well blended. 
  • In a separate bowl, whisk together the flour, baking soda, and salt. 
  • Stir the dry ingredients into the banana mixture until just blended. 
  • Fold in the nuts.  
  • Pour into the prepared pans.
  • Bake for about 50-60 minutes in the preheated oven. 
  • Loaves are done when toothpick inserted in center comes out clean.  
  • Wrap tightly in aluminum foil and freeze what you won't eat in two days.

Makes three medium loaves

My pan must not have been level.


01 09