Being a big fan of cooking shows and YouTube in general, I'd seen the Levain cookies reviewed several times, and everyone seemed to conclude that they are the BEST chocolate chip cookie of New York, if not the world.
Since I had no immediate plans to visit NY, I never really thought I'd get a chance to try the actual cookie. We did take a trip to Washington DC this past summer, though, and Georgetown had a Levain bakery. I told my husband that Levain was my number 2 tourist priority after the obvious touring of most of the Smithsonian and the National Mall.
I'll cut to the chase: the Levain Cookie, although large, gooey, and beautifully colored, didn't live up to my expectations. I mean, how could it? I probably broke into it too soon because it was fresh out of the oven (I had to wait a bit for my order to bake), but still, the one thing I noticed was a lack of flavor. Yeah. Flavor. My husband surreptitiously took a video of my comments, and I declared after tasting, "It needs salt." Actually I thought it needed vanilla too. I brought some cookies home for my foodie son to try, and his first comment upon tasting the chocolate chip walnut cookie was, "Needs salt." Maybe we just like salt around here.
This recipe here is adapted from Cupcake Jemma's version. I've added vanilla to the recipe and increased the salt and baking soda. I cut the size of the cookie in half because 1. I don't like uncooked dough in the center and 2. I'm not selling these at a bakery. As it is, the 60 gram cookie is like eating 2 normal sized chocolate chip cookies.
I cut back the size even further in later iterations because I wanted to try it and because I'm taking them to an event.
So why do I like THESE cookies enough to keep making them and commit them to this blog? First of all, they taste great. Maybe not my favorite CCC recipe, but very tasty. They're soft, thick, and baked all the way through. They kind of crumble a little like an American buttermilk biscuit, so when I eat one I break off a bite at a time, and I usually heat it up in the microwave for about 11 seconds too. Second of all, unlike lots of other CCC recipes, these still taste great even 2-3 days after baking. I usually won't eat a CCC after day 2, but these are the exception. Overall, a crowd-pleasing cookie.
I've written much more than I intended here, so without further ado, here's the recipe:
Levain Inspired Chocolate Chip Cookies (NOT a copycat recipe)
230 g unsalted butter, cold, cut into tablespoon size chunks
160 g granulated sugar
160 g brown sugar
450 g chocolate chips (I used Nestle semi-sweet morsels)
200 g walnut pieces (optional)
230 g self-rising flour*
200 g all purpose flour
2 teaspoons baking powder
1 teaspoon salt
1 teaspoon baking soda
2 large eggs, beaten
2 teaspoons vanilla extract
Instructions:
(Scroll to the photos at the end to see what this unconventional process looks like.)
In the bowl of a stand mixer, place the cold butter and mix on low for about a minute, just to break up the butter--do not cream the butter.
Add the granulated and brown sugar to the butter and mix again on low/medium low until little nuggets of butter & sugar form--again, do not cream this mixture.
Add the chocolate chips and walnuts (if desired), and mix again just to incorporate the chocolate chips and nuts.
In a separate bowl, combine the flours, baking soda, baking powder, and salt. Stir with a whisk until completely mixed.
Add the dry ingredients to the butter/sugar/chocolate/nuts mixture in the mixing bowl and mix on low until combined, about 30-45 seconds. It will still be dry and sandy looking.
Add the vanilla to the egg mixture and then add that to the mixture. Mix on low/medium low until dough starts to come together, but do not mix long enough to create a completely cohesive dough.
Using a large cookie scoop or a large spoon, make 60 gram gently formed balls of dough -- it's best if you don't pack the dough into a tight ball. Then flatten each ball into a disk that's about an inch thick.
Cover and freeze dough disks at least 90 minutes before baking.Preheat oven to 360 degrees Fahrenheit. Line a baking sheet with parchment paper and place in the oven to get hot while the oven preheats.
When pan and oven are heated, remove the pan from the oven, place frozen dough disks on pan allowing a couple of inches between them.
Bake at 360 degrees for about 14-15 minutes, until puffed and starting to crack. Take care to not over-bake. Underbaked is better than over-baked.
Remove from oven and allow to cool on cookie sheet at least five minutes before moving to a wire rack to cool completely. Alternately, if you have a rimless baking sheet, you can slide the parchment with the baked cookie sheets onto a cooling rack to cool until ready to eat, about 5-10 minutes. This is what I try to do so the cookies will not continue to bake on the hot baking sheet.
Place unbaked dough disks in a zip top freezer bag and store in the freezer until you want more cookies.
Store baked and cooled cookies in an airtight container.
Heat cooled cookies in the microwave on high for 10 seconds if you want to melt the chocolate and make the insides gooey again.
Makes about 30 cookies
*You can mix your own self-rising flour by combining 2 cups all purpose flour with 3 teaspoons baking powder and 1/2 teaspoon salt. Then use just 230 grams of that for this recipe. Save or toss what's leftover...OR use the following measurements if you don't want to bother with mixing the self-rising flour:
230 g unsalted butter, cold, cut into tablespoon size chunks
160 g granulated sugar
160 g brown sugar
450 g chocolate chips
200 g walnut pieces (optional)
430 g all purpose flour
1 teaspoon baking soda
4 teaspoons baking powder
1 1/2 teaspoons salt
2 large eggs, beaten
2 teaspoons vanilla extract
Make sure the butter is COLD.
Just break up the butter -- don't cream it.
You'll still have chunks of butter after mixing in the sugars.
Yeah, the chips go in before the flour, and the egg goes in at the end.
Everything but the egg and vanilla here.
The dough is never a cohesive mass.
I actually do use a kitchen scale for this.
Frozen dough balls going into the oven now.
Baked.
These ones have nuts. The dough mixed above didn't have them.
Make the filling at least 3 hours before planning to make the pop tarts because you want it to be as viscus as possible.
In a medium size saucepan over medium-low heat, place the butter, sugar, corn syrup, and egg. Stir ingredients to incorporate and continue stirring while it cooks.
Cook until the mixture comes to a gentle boil/simmer and thickens slightly.
Once it boils, remove from the heat and add the pecans along with the vanilla and butter flavor/extract. Stir completely.
Transfer mixture to a heat-proof container (like a clean mason jar), allow to cool, and then refrigerate until needed.
The Crust
Ingredients:
200 grams all-purpose flour, plus more for dusting
32 grams cornstarch
30 grams powdered sugar
1/2 teaspoon salt
1/8 teaspoon baking soda
1/4 teaspoon baking powder
56 grams cold butter, cut into 8 pieces
90 milliliters cream
Instructions:
In the bowl of a food processor, combine the flour, cornstarch, powdered sugar, salt, baking soda, and baking powder. Pulse a few times to blend the dry ingredients.
Add the butter and pulse a few more times until you get a sandy-looking mixture with possibly a few small chunks of butter left.
Pour in the cream and pulse a few times to disperse the cream. Then process for 30 to 60 seconds until the dough comes together and starts forming a ball, or at least cohesive chunks.
Get a square piece of plastic wrap and set aside (you'll need two pieces of plastic wrap total).
Weigh the dough and then divide into two equal portions.
Working with one half of the dough at a time on the plastic wrap, pat into a ball, and then flatten the sides of the ball to sort of form a dough cube.
Flatten the cube while trying to maintain the square shape as much as possible.
Once it's about 1/2 inch thick, place onto the plastic wrap and try to neatly fold the dough into the plastic wrap so you get squared off corners with the plastic wrap.
Gently use a rolling pin to roll the dough in the plastic wrap so the dough squishes into the corners. It probably won't create a perfect square, but the more square you can get it now, the easier the rolling will be later.
Repeat with the other half of the dough.
Place dough in the refrigerator for about an hour, or up to 2 days.
The Pop Tarts
Ingredients:
1 batch (in 2 pieces) pop tart dough (see above)
1 cup (approximately) pecan pie filling
90 grams powdered sugar
3-4 teaspoons water, plus more for sealing pop tarts
2 tablespoons crushed toasted pecans and or 2 tablespoons crushed toffee bits
Equipment:
baking sheet
parchment paper
rolling pin
stiff ruler, plastic or metal
pizza cutter
fork
knife or offset spatula
small pastry brush
whisk
Instructions:
Remove the dough from the refrigerator and allow to sit at room temperature 5-10 minutes.
Preheat oven to 375 degrees Fahrenheit, and line a baking sheet with parchment paper.
Lightly dust your rolling surface with flour, and turn out one of your dough pieces. Flour your rolling pin and gently swat the dough to soften it up--tap a few times in each direction side to side, top to bottom, and diagonally both ways. Turn the dough over and swat it on that side too.
Start rolling the dough out into a rectangle and about 1/8" or 2 mm thickness, keeping the corners as square as possible. If the dough is cracking a lot, let it sit a few more minutes to soften before continuing to roll.
Using the ruler and the pizza cutter, cut the edges of the dough to make a clean-looking rectangle, preserving as much area as possible. You can bake off the scraps later or throw them away.
Measure the height and width of the sheet of dough and divide by 3. Then cut into 9 rectangles that are as equally sized as possible. Move the rectangles to the parchment-lined baking sheet and set aside.
Repeat the swatting and rolling with the second piece of dough, going just a little bit thinner to make a slightly larger rectangle. Repeat the measuring and cutting as well.
Using a floured fork, carefully poke holes into each piece of top crust.
Get your pecan pie filing, and using a spoon or offset spatula, spread about 2 to 3 teaspoons of filling onto the pieces of dough on the pan. Leave at least a quarter inch around the edge clear of filling. Repeat with remaining bottom crusts.
Using the pastry brush and water, lightly moisten the edges of dough around the filling.
Place a top crust onto each of the bottom ones, gently pressing the edges together. Once you've done this with all of the pop tarts, dip a fork in flour and crimp all of the edges of each pop tart.
(If you're using crushed toffee for the topping, lightly brush the top crusts with water and sprinkle evenly with crushed toffee.)
Bake at 375 degrees for 15-17 minutes, or until edges are starting to brown.
Move pop tarts to a wire rack to cool completely.
Once pop tarts are completely cool, whisk the 90 grams powdered sugar with 3 teaspoons water. Add the last teaspoon of water if the mixture is too thick and/or dry. This mixture should not be runny.
Using an offset spatula or a knife, spread about a teaspoon of frosting onto each pop tart and then immediately sprinkle with crushed pecans, if desired.
Allow frosting to set before enjoying.
Eat or freeze within 3 days.
Only toast the pop tarts if you do not frost them. This frosting will burn in a toaster.
Here's a video of how I made cherry pop tarts. Same basic process applies with the Pecan Pie Pop Tarts.
My good friend Amy made this for us one summer evening, and my husband who doesn't really go out of his way for veggies LOVED it. (I know corn is more of a grain than a vegetable, but we grew up in the 70s and our moms counted it as a vegetable.)
It's a light, refreshing, and flavorful salad. I still need to perfect it, but since I keep going back to my texts to get the recipe, I'm finally committing it to the blog. I'll try to remember to make changes here as I adjust the recipe. What Amy sent me was not an exact recipe, so the way I quantified it here is me ballparking it.
The strawberry pop tarts I made using that recipe actually turned out strange and greasy. I must have done something wrong because Claire's didn't look like that. They looked precise, flaky, and perfect. Mine, not so much.
Then a month ago I went to breakfast with some friends and had the restaurant's homemade key lime pop tart, and that was also quite greasy, and frankly, not tasty.
Since I had so much sour cherry jam on my hands because of my front yard cherry tree's excessive production this year, I thought I'd try making pop tarts again, but with a more "traditional" pop tart crust, like the ones we get in the blue box.
In Jennie's Kitchen had just what I was looking for: kind of a dry, tender crust. The original recipe calls for twice the amount of powdered sugar you see below, but I'm more of a savory person, so I did what you see. If you like more sweetness, go for the full 60 grams of powdered sugar.
This recipe calls for a food processor, but I'm sure it would work by hand using a pastry blender and some elbow grease.
What I have ended up with are fantastic pop tarts that are getting rave reviews from friends and colleagues. Hopefully I'll be posting more variations soon, along with a TikTok. I actually recorded videos for the TikTok but broke the process up too much and realized I need to not do that.
At any rate, if you're hankering to make your own pop tarts, try this recipe out. I think you'll be pleased.
Note: I've included my TikTok video showing my Pop Tart making process at the end of the recipe below.
200 grams all-purpose flour, plus more for dusting
32 grams cornstarch
30 grams powdered sugar
1/2 teaspoon salt
1/8 teaspoon baking soda
1/4 teaspoon baking powder
56 grams cold butter, cut into 8 pieces
90 milliliters cream
Instructions:
In the bowl of a food processor, combine the flour, cornstarch, powdered sugar, salt, baking soda, and baking powder. Pulse a few times to blend the dry ingredients.
Add the butter and pulse a few more times until you get a sandy-looking mixture with possibly a few small chunks of butter left.
Pour in the cream and pulse a few times to disperse the cream. Then process for 30 to 60 seconds until the dough comes together and starts forming a ball, or at least cohesive chunks.
Get a square piece of plastic wrap and set aside (you'll need two pieces of plastic wrap total).
Weigh the dough and then divide into two equal portions.
Working with one half of the dough at a time on the plastic wrap, pat into a ball, and then flatten the sides of the ball to sort of form a dough cube.
Flatten the cube while trying to maintain the square shape as much as possible.
Once it's about 1/2 inch thick, place onto the plastic wrap and try to neatly fold the dough into the plastic wrap so you get squared off corners with the plastic wrap.
Gently use a rolling pin to roll the dough in the plastic wrap so the dough squishes into the corners. It probably won't create a perfect square, but the more square you can get it now, the easier the rolling will be later.
Repeat with the other half of the dough.
Place dough in the refrigerator for about an hour, or up to 2 days.
The Pop Tarts
Ingredients:
1 batch (in 2 pieces) pop tart dough (see above)
3/4 to 1 cup fruit jam
90 grams powdered sugar
3-4 teaspoons water, plus more for sealing pop tarts
food color (optional)
sprinkles (optional)
Equipment:
baking sheet
parchment paper
rolling pin
stiff ruler, plastic or metal
pizza cutter
fork
knife or offset spatula
small pastry brush
whisk
Instructions:
Remove the dough from the refrigerator and allow to sit at room temperature 5-10 minutes.
Preheat oven to 375 degrees Fahrenheit, and line a baking sheet with parchment paper.
Lightly dust your rolling surface with flour, and turn out one of your dough pieces. Flour your rolling pin and gently swat the dough to soften it up--tap a few times in each direction side to side, top to bottom, and diagonally both ways. Turn the dough over and swat it on that side too.
Start rolling the dough out into a rectangle and about 1/8" or 2 mm thickness, keeping the corners as square as possible. If the dough is cracking a lot, let it sit a few more minutes to soften before continuing to roll.
Using the ruler and the pizza cutter, cut the edges of the dough to make a clean-looking rectangle, preserving as much area as possible. You can bake off the scraps later or throw them away.
Measure the height and width of the sheet of dough and divide by 3. Then cut into 9 rectangles that are as equally sized as possible. Move the rectangles to the parchment-lined baking sheet and set aside.
Repeat the swatting and rolling with the second piece of dough, going just a little bit thinner to make a slightly larger rectangle. Repeat the measuring and cutting as well.
Using a floured fork, carefully poke holes into each piece of top crust.
Get your fruit jam, and using a spoon or offset spatula, spread about 2 to 3 teaspoons of jam onto the pieces of dough on the pan. Leave at least a quarter inch around the edge clear of jam. Repeat with remaining bottom crusts.
Using the pastry brush and water, lightly moisten the edges of dough around the jam.
Place a top crust onto each of the bottom ones, gently pressing the edges together, taking care not to squeeze out any jam. Once you've done this with all of the pop tarts, dip a fork in flour and crimp all of the edges of each pop tart.
Bake at 375 degrees for 15-17 minutes, or until edges are starting to brown.
Move pop tarts to a wire rack to cool completely.
Once pop tarts are completely cool, whisk the 90 grams powdered sugar with 3 teaspoons water. Add the last teaspoon of water if the mixture is too thick and/or dry. This mixture should not be runny. Whisk in food coloring, if desired.
Using an offset spatula or a knife, spread about a teaspoon of frosting onto each pop tart and then immediately apply sprinkles, if desired.
Allow frosting to set before enjoying.
Eat or freeze within 3 days.
Only toast the pop tarts if you do not frost them. This frosting will burn in a toaster.
If you've ever watched Apple TV+'s Ted Lasso, you're familiar with Ted's shortbread in the little pink boxes. Now that the series is over, I'm finally getting around to making the recipe I found on Instagram that supposedly comes from Apple TV+ via Emmy Magazine. Although I was unable to locate the recipe at the Emmy Magazine website, I found it in several other places.
I've made this recipe twice so far. The first time I followed the recipe almost exactly, but the shortbread was underbaked, in my opinion. The edge pieces turned out nice, but the center ones were too soft. Not terrible, but soft.
The second time around that you see pictured here, I baked the shortbread sticks a second time after I had removed them from the pan and separated them from each other. This ensured all pieces were crisp with a nice browned butter flavor. Mmmm. I've already eaten too many of these.
I also decided to sprinkle the tops with a little bit of granulated sugar because I thought it would look nice and add just a tad more sweetness. I think it was a good call.
Also, many recipes I've seen for shortbread call for vanilla, but I think that distracts from the butter flavor, so if you're thinking of adding vanilla I recommend at least trying these without vanilla first, and then see if you think they need that extra flavor for your taste. Do what you have to, and enjoy.
Add the butter to a medium-large mixing bowl or in the bowl of a stand mixer. Beat the butter for 3-5 minutes until light. Stop the mixer once or twice to scrape down sides of bowl.
Gradually add the powdered sugar into the sugar with the mixer on low. Once powdered sugar is incorporated, beat on high until pale and fluffy, about 2-3 minutes, stopping to scrape sides of bowl once or twice.
In a separate bowl, mix the flour and kosher salt with a whisk, and then add to the butter/sugar mixture. Mix on low, and then on medium, just until it comes together. You do not want to over beat the dough and develop gluten.
Move the dough to the prepared pan. Using your finger tips, press the dough evenly into the pan, making the edges as neat as possible.
Place the pan in the refrigerator for at least 30 minutes.
Preheat oven to 310 degrees F.
Remove pan from the refrigerator, and using a sharp knife, cut dough into 7 or 8 long strips. Then cut two lines perpendicular to the others to create three even columns, each containing 7 or 8 rectangles. (Be careful to not cut into the parchment paper,)
Use a toothpick or wooden skewer to poke about 8 holes into each rectangle.
Put pan in oven and bake for 50 minutes at 310 degrees F.
After 50 minutes, remove the pan from the oven. Re-cut the lines, being careful to not cut all the way through the parchment paper, and then sprinkle the granulated sugar all over the top of the cut shortbread.
Lift the shortbread out by lifting the parchment paper, and place it on a baking sheet. Using the knife, gently separate the shortbread into its individual pieces, leaving about a quarter inch between pieces.
Return the shortbread to the oven (on the baking sheet this time) and bake at 310 degrees F for another 10-15 minutes, or until shortbread looks a little dryer and slightly more browned than before.
Allow shortbread to cool completely before enjoying.
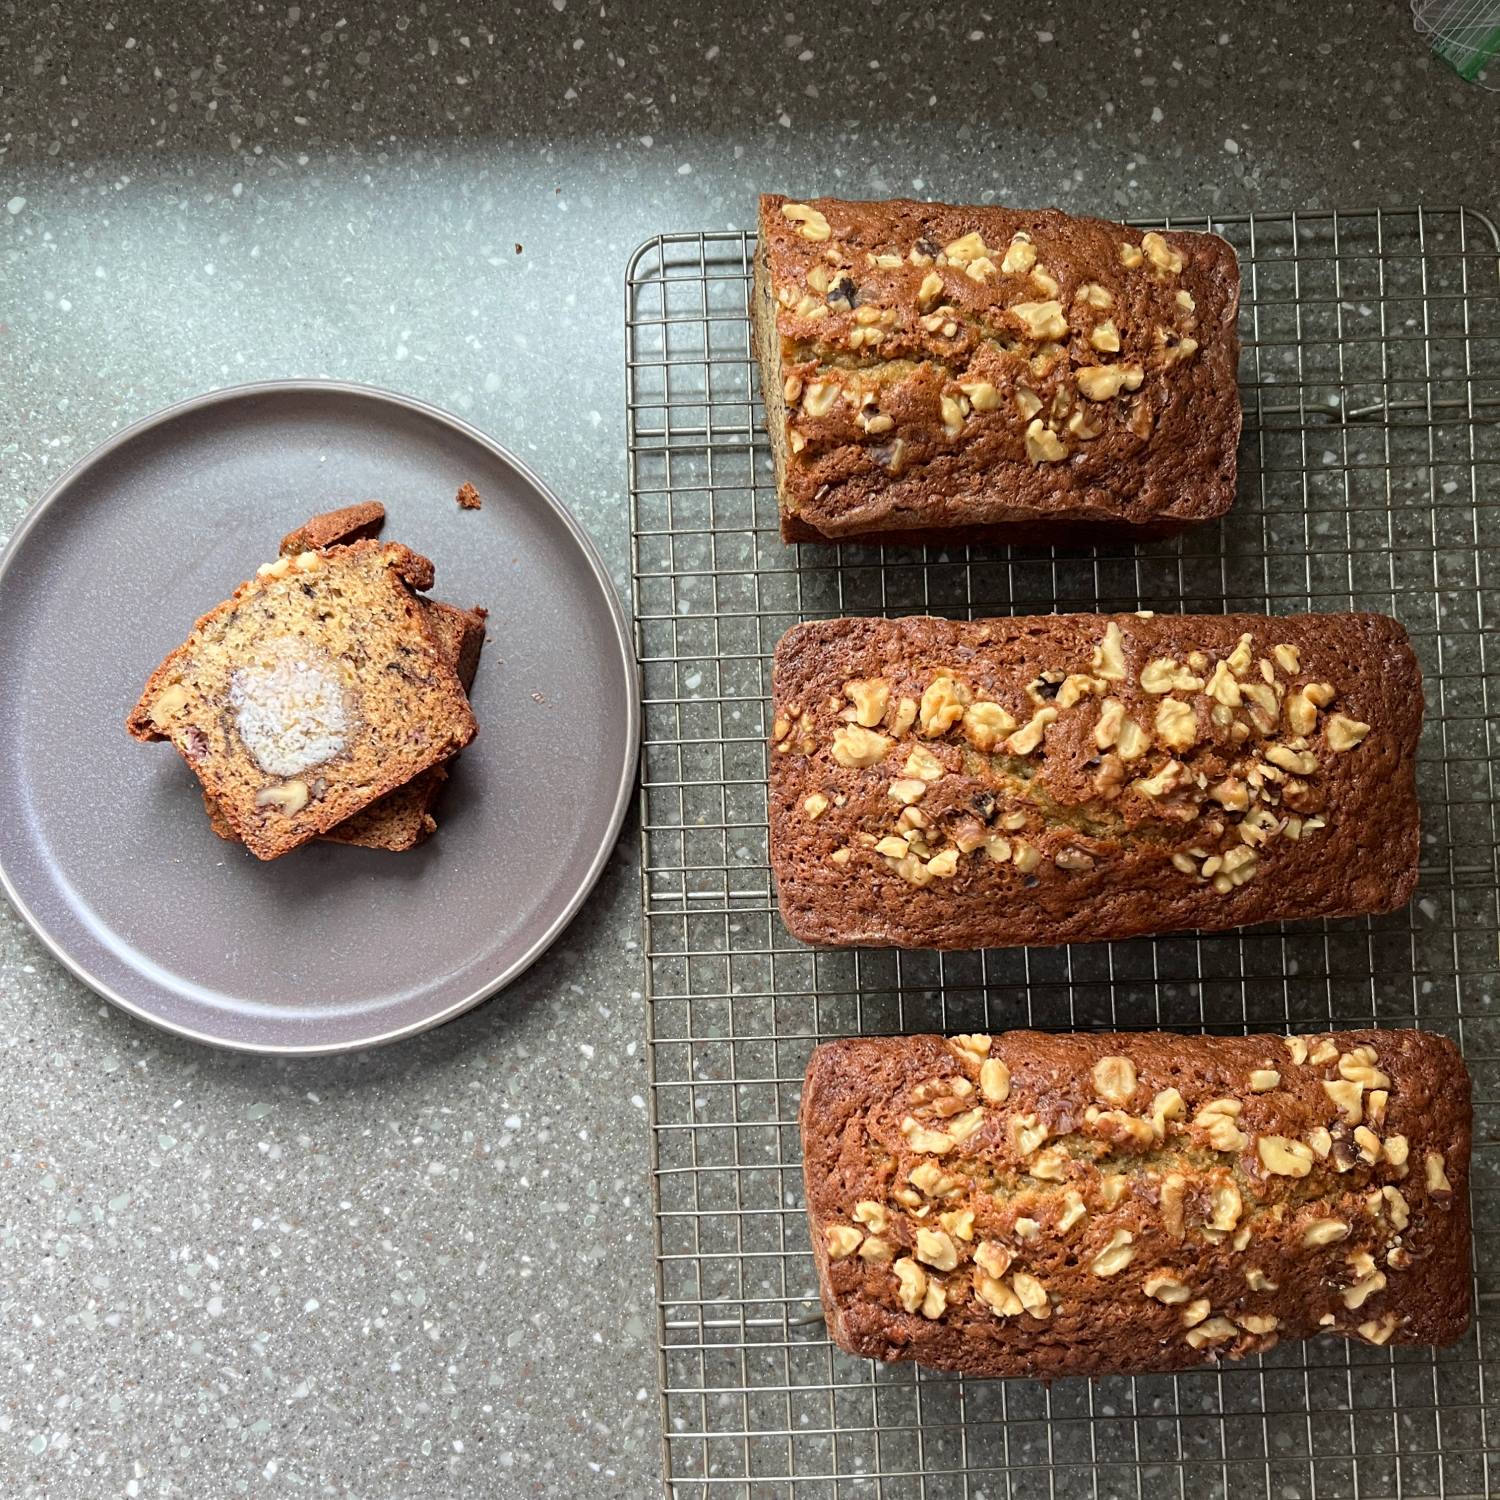
Somehow I ended up with loads of super ripe bananas in my kitchen this weekend, so I decided to take my favorite pumpkin bread recipe and modify it for bananas. Since the bananas were so ripe and sweet, I cut back on the sugar, and I also cut back on the water in the recipe because it seemed like the original 2/3 cup would be too much. I subbed vanilla for the fall spices, and you know what? This is now my favorite banana bread recipe.
I don't know if it's the combination of white and brown sugar, or just the balance of all the ingredients, but this is just a good, solid, sweet banana bread.
Feel free to leave the nuts out if it's not your thing. It will be just as delicious.
Banana Nut Bread II
INGREDIENTS
15 oz mashed (very) ripe banana (I actually weighed mine)
I am a little bit obsessed with Thistle's Summit Bakery's oatmeal pies. I can get them at my favorite coffee shop, The Slow Down Coffee Company here in Des Moines, but what I really want to do is crack the recipe so I can make them on my own.
The oatmeal cookie has this certain flavor that I can't quite put my finger on. I can't tell if it's just slightly saltier than your average oatmeal cookie, or if there's a molasses flavor--or it's probably just a perfect balance of all the flavors. The texture is perfect too, though--not too soft and squishy, and not too crisp. Just nice and chewy. The oatmeal pie filling is so nice too. It feels cool on my tongue, and not overly sweet. It's all really cookie perfection, which is surprising coming from me because I'm both a huge chocolate fan AND a cookie snob.
At any rate, I've been taking some of my "failed" attempts to work, and people seem to love them. I suspect when you place a creamy sugary filling between any two cookies, you're likely to get positive reviews. Just a hypothesis that I'll probably continue to test in the coming months as I pursue perfection of this recipe.
1/2 cup mashed unripe banana (Use ripe bananas for more banana flavor.)
Filling Ingredients:
1/2 cup vegetable shortening (like Crisco)
2 1/2 cups (about 10 oz.) powdered sugar
1 1/2 teaspoons vanilla extract
pinch of salt
2-3 tablespoons oat milk
Instructions:
In a medium bowl, combine flour, oats, salt, baking soda, and cinnamon. Stir to combine and set aside.
In a mixing bowl, cream the vegan butter, sugar and molasses. Add the vanilla and mashed bananas.
Stir in the dry ingredients to incorporate.
Cover and refrigerate for a couple of hours.
Scoop about 2 tablespoons (I used a cookie scoop) and flatten slightly so you end up with a disk that's about 1 1/2 inches in diameter and about a half inch thick.
Place prepared dough disks onto a wax paper or parchment lined pan/container that you can refrigerate or freeze.
When all dough has been scooped, you can refrigerate for a few days or freeze.
When ready to bake, preheat oven to 350 degrees Fahrenheit and line a baking sheet with parchment paper.
Place cookie dough onto prepared baking sheet, allowing about 1 1/2 to 2 inches between dough disks.
Bake at 350 degrees for about 13-15 minutes, depending on how soft you like your cookies.
Remove from oven and allow to cool about 5 minutes before removing to a wire rack to cool completely.
When cookies are cool, prepare filling by creaming together the vegetable shortening, powdered sugar, vanilla extract, salt, and 2 tablespoons oat milk. If the filling seems too stiff, add a little more oat milk, taking care not to overdo it. Continue to mix until very smooth and creamy.
Build cookie sandwiches by scooping about 1 tablespoon of filling onto the bottom of one cookie and then top with another. Squish together carefully until filling is almost to the edge.


.jpg)