Showing posts with label My Favorites. Show all posts

Thursday, October 19, 2023

Salted Caramel Sauce


Salted Caramel Sauce


This here has to be one of my favorite recent recipes. I started making cold brew coffee recently, and this is what I've been using to sweeten it. And I also eat it by the spoonful on occasion. It tastes like See's Candies Butterscotch Lollipop in liquid form. Just delightful.

If you've never worked with molten sugar before, please be extra careful, and watch the video below to see the process. It's not a difficult recipe, but working with melted sugar is always  somewhat delicate and dangerous. 

I haven't tried it yet, but I'm sure this sauce would taste great on ice cream or the Butterscotch Pots de Creme that I have posted here on the blog. In any case, if you enjoy salted caramel, you'll love this recipe.

Please note that there's a very fine line between flavorful and burnt caramel, so if you're trying this for the first time, err on the side of a lighter-colored caramel. Once you get the feel of it, you can risk going a little darker the next time--because there WILL BE a next time.

Enjoy!

Salted Caramel Sauce

Ingredients:
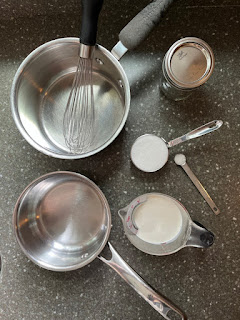
  • 2/3 cup heavy cream
  • 1/2 cup white sugar
  • 1/4 teaspoon sea salt
Equipment/Tools:
  • clean & warm 1/2 pint mason jar
  • heavy-bottomed saucepan
  • small saucepan
  • wire whisk
  • silicone spatula
  • measuring cups and spoons
Instructions:
  • Place cream in the small saucepan over low heat. Once it's hot, you can turn it off. Keep an eye on it to make sure it doesn't boil.
  • Place the clean mason jar on the stove to stay a little warm while you make the caramel sauce.
  • Pour the sugar into the large saucepan set over medium heat.
  • It will take a while, like 5-8 minutes before you start seeing the sugar start to melt. When you start seeing melted patches, start gently swirling the pan to evenly distribute the sugar and prevent any burned spots. 
  • Continue melting and swirling the sugar until it's a deep amber color. Once it's deep amber, remove from the heat and pour in about half of the cream, which will bubble up violently. 
  • Whisk the sugar and cream together, making sure to get any sugar in the corners of the pan. 
  • Whisk in the remaining cream, and then the salt. Whisk until smooth, again paying attention to the corners of the pan. 
  • Pour the caramel sauce into the mason jar, scraping all the goodness in using a silicone spatula. 
  • Allow the caramel to cool enough to touch the jar without hurting yourself, put the top on the jar (not too tight), and allow to cool completely before placing in the refrigerator.
  • Use in your coffee or enjoy by the spoonful.
Makes about 1 cup of sauce


Saturday, March 4, 2023

Ooey Gooey Chocolate Chocolate Chip Cookies


Gooey Chocolate Chocolate Chip Cookies


Lately I've gotten into this habit of watching mostly cooking Youtube videos in the morning before and after my morning spinning bike workout. I'll start a video while I do my arm/shoulder physical therapy exercises, and then I'll turn on my spinning workout video. My treat for my post-workout cooldown is finishing the video. 

This past week I tumbled down a New York City chocolate chip cookie Youtube rabbit hole, and discovered Cupcake Jemma, a delightful baker based in the UK. (Check out the Crumbs & Doilies Bakery website here.) There were two things about the two Cupcake Jemma videos I watched that struck me. The first is this recipe that I've tweaked a bit here by adding vanilla and decreasing the size of each cookie by half (I mean, I'm not a baker selling these things--just an average home baker who actually eats and shares them.) 

The second thing that struck me is the mixing method they used for these cookies and in their rendition of Levain's famous NYC Chocolate Chip Cookie. Rather than creaming the butter and sugars, adding eggs & vanilla,  adding all the dry ingredients, and then adding the chocolate chips as most cookie recipes call for, Cupcake Jemma barely mixes the butter and sugars, adds the chocolate chips, then the dry ingredients and lastly the eggs. What the...? 

Sounded so crazy to me, but the results don't lie. These chocolate cookies are gooey, tender, flavorful, and just perfectly satisfying. I may be obsessed.

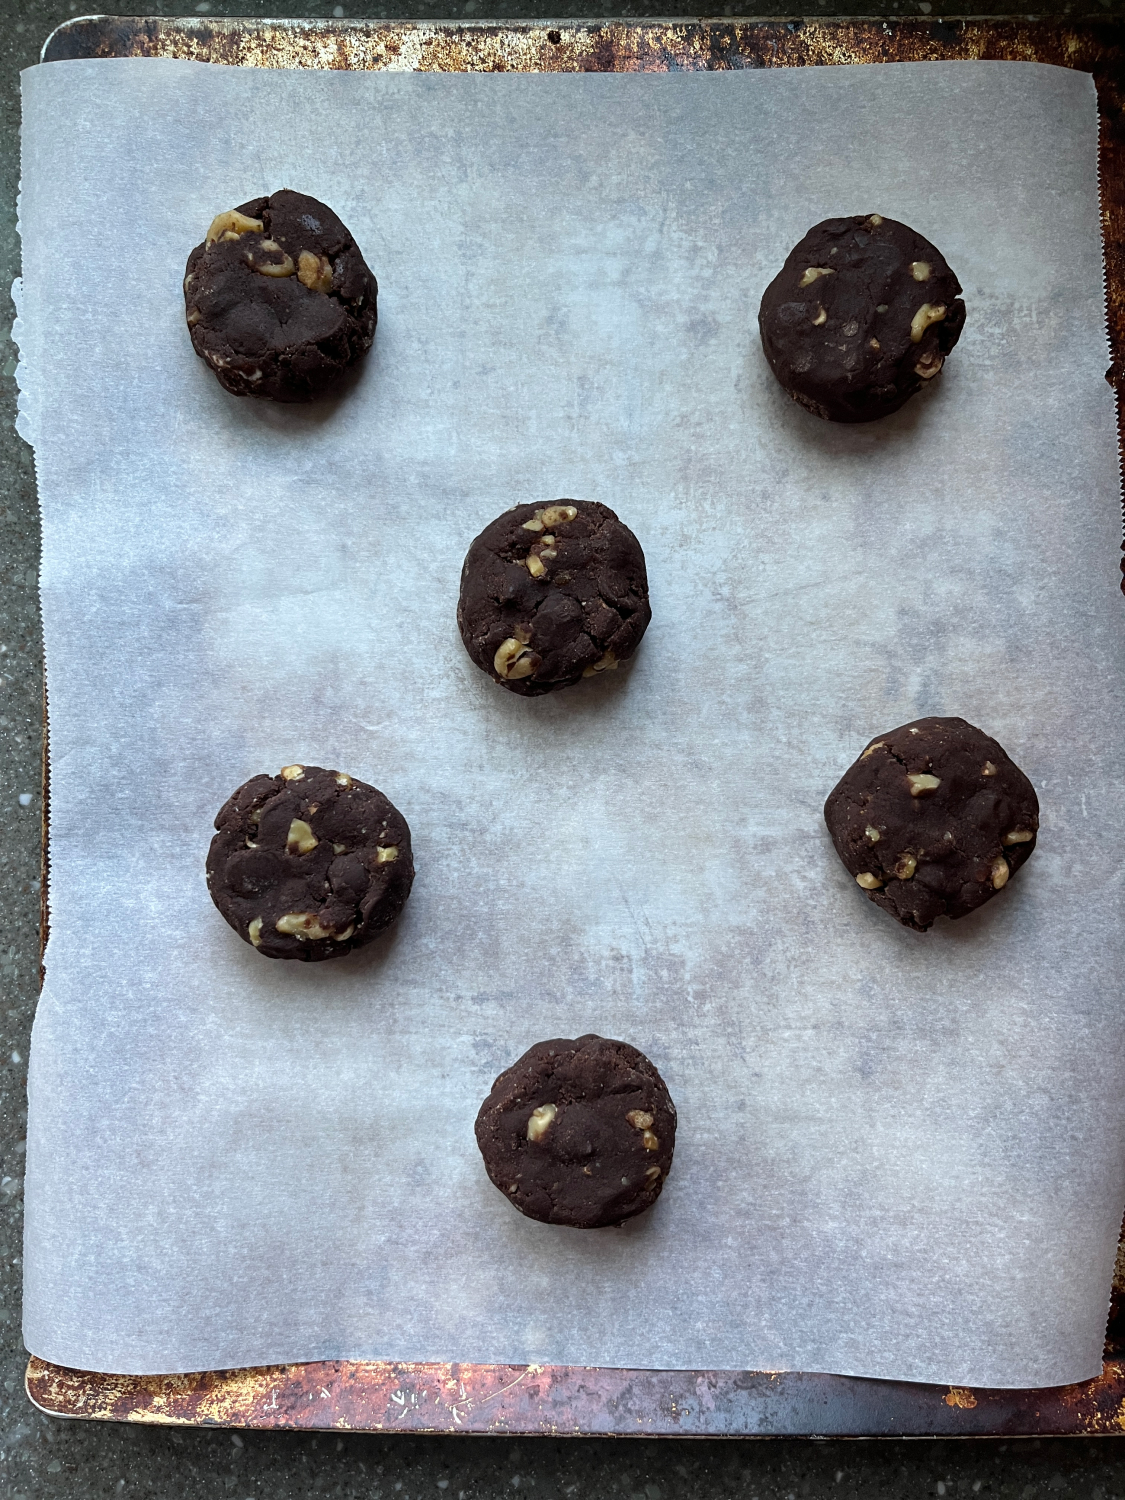
The first batch I made were just half-sized versions of Cupcake Jemma's, but they failed to spread at all and remained kind of ball-shaped, which wasn't very attractive (see pic below). So I did what any other obsessed person would do and I almost immediately made another batch. This time I flattened each ball just a bit, and decreased my baking time a bit. The cookies came out attractive AND delicious. Perfect. 

Now here's the recipe for you to go and try yourself. 

You're welcome.

Gooey Chocolate Chocolate Chip Cookies
     --Adapted from Cupcake Jemma's Recipe

Ingredients: 
  • 230 g unsalted butter, cold, cut into tablespoon size chunks
  • 160 g granulated sugar
  • 160 g brown sugar
  • 450 g dark chocolate chips (I love Nestle's Dark Chocolate Morsels)
  • 200 g walnut pieces (optional)
  • 430 g all purpose flour
  • 70 g cocoa powder (preferably Dutch process)
  • 1/4 teaspoon baking soda
  • 2 tablespoons baking powder
  • 1 1/2 teaspoon salt
  • 2 large eggs plus 1 yolk, beaten
  • 1 1/2 teaspoons vanilla extract
Instructions:
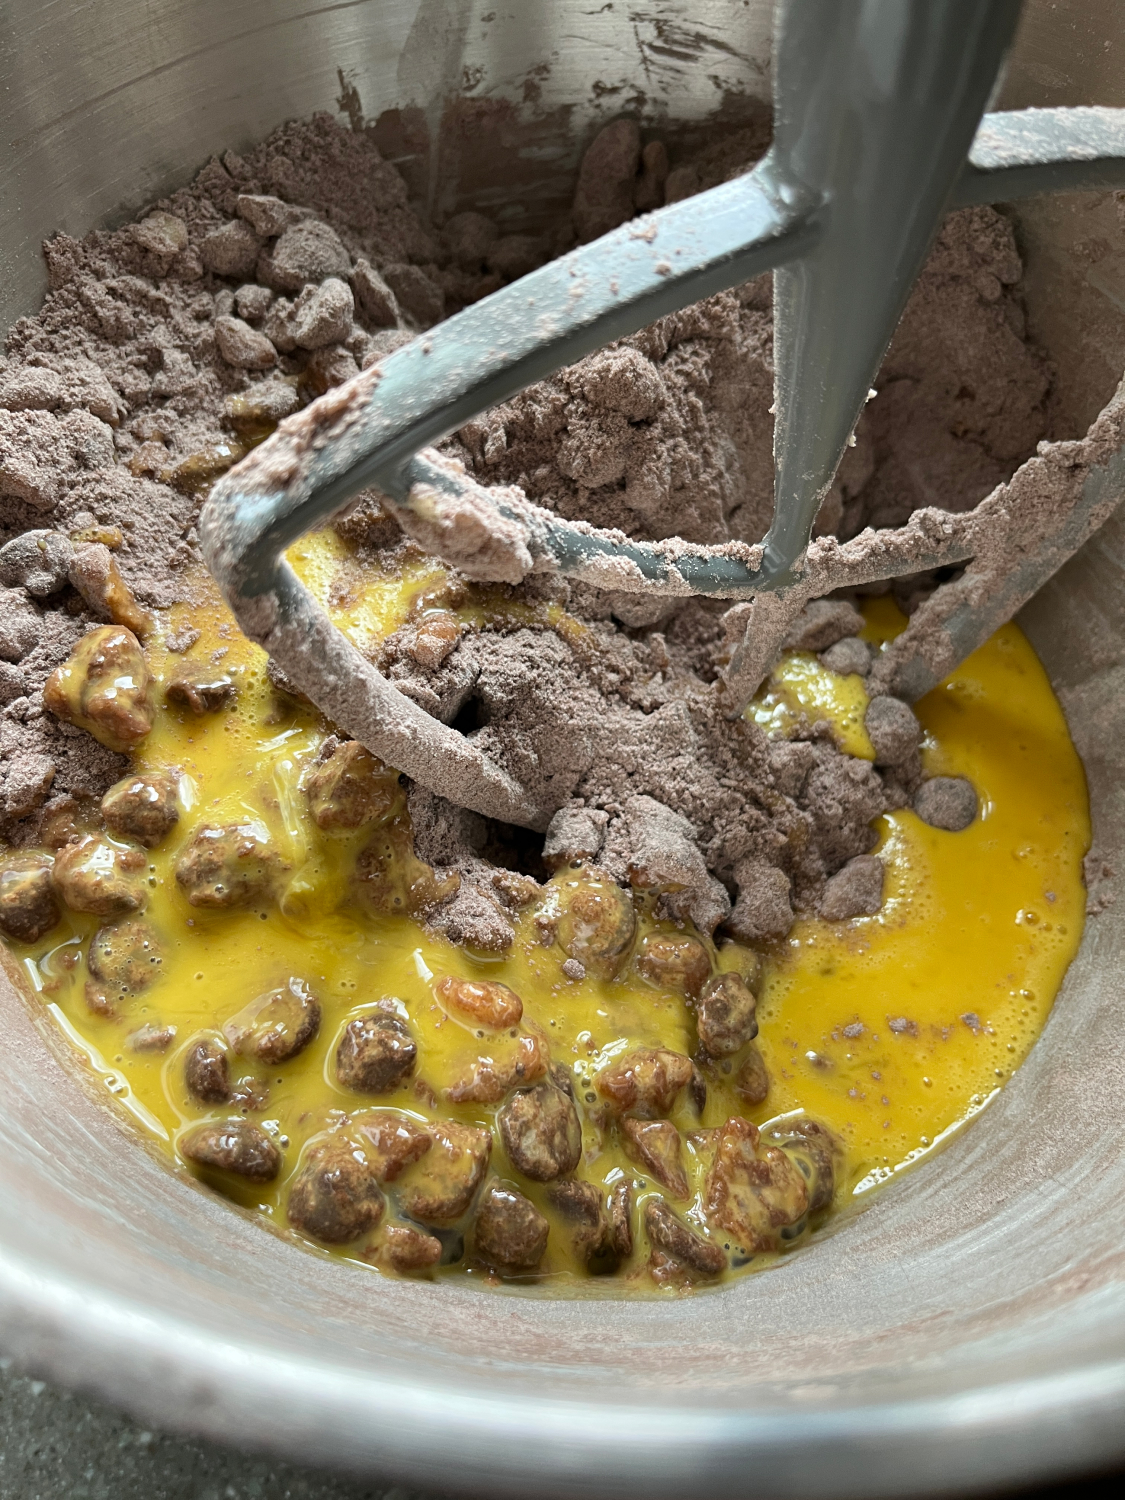
  • NOTE: See images below instructions for visuals of the various stages of this dough mixing process.
  • In the bowl of a standing mixer, place the cold butter and mix on low for about a minute, just to break up the butter--do not cream the butter.
  • Add the granulated and brown sugar to the butter and mix again on low/medium low until little nuggets of butter & sugar form--again, do not cream this mixture.
  • Add the chocolate chips and walnuts (if desired), and mix again just to incorporate the chocolate chips and nuts.
  • In a separate bowl, combine the flours, cocoa powder, baking soda, baking powder, and salt. Stir with a whisk until completely mixed. 
  • Add the dry ingredients to the butter/sugar/chocolate/nuts mixture in the mixing bowl and mix on low until combined, about 30-45 seconds. It will still be dry and sandy looking.
  • Add the vanilla to the egg mixture and then add that to the mixture. Mix on low/medium low until dough starts to come together, but do not mix long enough to create a completely cohesive dough.
  • Using a large cookie scoop or a large spoon, make 60 gram balls of dough. Then flatten each ball into a disk that's about an inch thick.
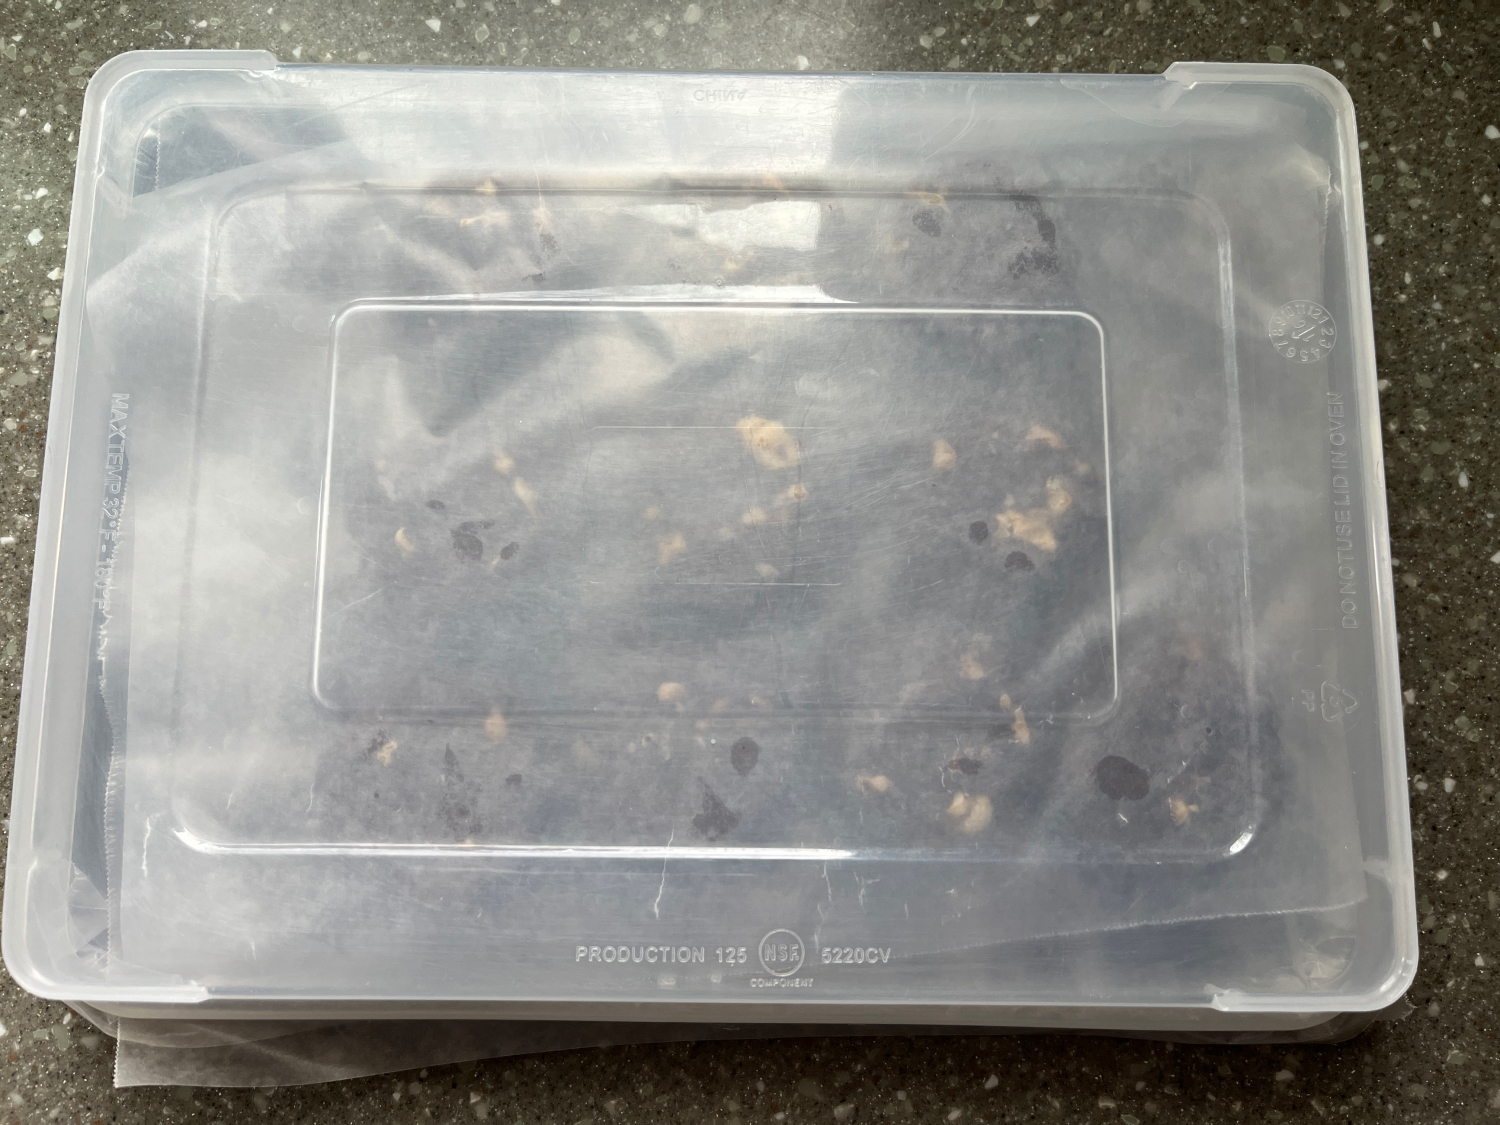
  • Cover and freeze dough disks at least 90 minutes before baking.
  • Preheat oven to 360 degrees Fahrenheit. Line a baking sheet with parchment paper and place in the oven to get hot while the oven preheats.
  • When pan and oven are heated, remove the pan from the oven, place frozen dough disks on pan allowing a couple of inches between them.
  • Bake at 360 degrees for about 14-15 minutes, until puffed and starting to crack. Take care to not over-bake. Underbaked is better than over-baked.
  • Remove from oven and allow to cool on cookie sheet at least five minutes before moving to a wire rack to cool completely. Alternately, if you have a rimless baking sheet, you can slide the parchment with the baked cookie sheets onto a cooling rack to cool until ready to eat, about 5-10 minutes. This is what I try to do so the cookies will not continue to bake on the hot baking sheet.
  • Place unbaked dough disks in a zip top freezer bag and store in the freezer until you want more cookies. 
  • Store baked and cooled cookies in an airtight container.
  • Heat cooled cookies in the microwave on high for 10 seconds if you want to melt the chocolate and make the insides gooey again.
Makes about 30 cookies


Dough disks ready for the freezer.


See the difference between the flattened version and the ball?


Friday, February 24, 2023

Chewy Chocolate Strata Cookies

Chewy Chocolate Strata Cookies 

I already have a version of this cookie on the blog here, but I recently took it a step crazier and created chocolate wafer pieces so the resulting cookies have the stratified chocolate that you see in the pics. They really are worth the effort because the chocolate gets distributed in lovely even layers, providing the eater with the perfect amount of chocolate in each bite of cookie. 

I rarely eat cookies past the first two days of their lives, but these ones I'll eat even on the third day (if they don't disappear) because they don't get stale the same way some other recipes do. 

Heads up: this is a ridiculously complex recipe. Not difficult really. Just lots of prep to get to the fantastic final product. I've seen chefs on TV and YouTube use chocolate baking discs, but those always seem so expensive. Plus, I just love Dove Dark Chocolate in my cookies.

There are lots of videos on Youtube that will show you chocolate tempering techniques (like this one). I believe this one shows three methods. I use a version of the "seeding" method, and that is described below.If you don't want to go through the trouble of tempering the chocolate, just chop up two bags of Dove Dark Chocolate Promises. They'll still taste great.

So buckle up and get ready for some of the most satisfying chocolate chip cookies you've ever eaten.

Chocolate Strata Cookies
    --adapted from For Me-For You who in a roundabout way got it from Jacques Torres

Ingredients:
  • 2 cups minus 2 tablespoons cake flour 
  • 1 2/3 cups bread flour (I used King Arthur Unbleached All Purpose Flour)
  • 1 ¼ teaspoon baking soda

  • 1 ½ teaspoon baking powder

  • 1 ½ teaspoon coarse salt, such as kosher

  • 1 ½ sticks unsalted butter, softened

  • 4 ounces cream cheese, room temperature
  • 1 ¼ cups packed light brown sugar

  • 1 cup plus 2 tablespons  granulated sugar

  • 2 large eggs
 (room temperature)
  • 2 teaspoons vanilla extract

  • 20 oz. good quality semi sweet chocolate chips/chunks/discs (I used two 9.5 oz bags of Dove Dark Chocolate Promises, unwrapped an chopped into large chunks.)
Instructions:
  • First prepare the chocolate.
    • Line a half sheet baking pan with parchment paper and set aside.
    • Place all but about 2-3 ounces of the chocolate in a glass or metal bowl (that's about 10-12 Dove Promises), and then place that bowl over a double boiler set to medium (with the water already at a simmer).
    • Allow chocolate to melt about 2/3 of the way, stirring occasionally.
    • Remove from heat and continue stirring until chocolate is completely melted. If it's not all melted within about 5 minutes, return to the double boiler for another minute or two, remove, and stir until chocolate is melted.
    • Add 2-3 Dove Promises at a time to the melted chocolate and stir until they are completely melted in. Repeat until all chocolate is gone. Ideally you'll have one last Promise that just won't melt. The chocolate will become a bit thicker, like a loose chocolate pudding. 
    • Pour chocolate out onto the prepared baking sheet and spread evenly to all edges using an offset spatula (I told you this was complicated).
    • Set aside and allow chocolate to set. Once set, move parchment to a cutting surface and cut chocolate into 1 1/2 centimeter squares.
  • Place 1/2 stick of butter in a small or medium sized heat-proof bowl.
  • In a small pan over medium-low heat, melt the other stick of butter, and stir until its foamy on top and you can see browned bits of milk solids at the bottom. Be careful to not over-brown the butter. 
  • Pour hot browned butter over the 1/2 stick butter in the bowl. Also place the cream cheese in there to get it started softening.
  • Combine flours, baking soda, baking powder, and salt in a bowl. Put dry ingredients through a sieve to sift them together. Set aside.
  • Using a mixer fitted with paddle attachment, cream butter, cream cheese, and sugars until very light and fluffy, about 3 to 5 minutes. Add the eggs and vanilla and mix until thoroughly combined. Scrape down the sides of the bowl with a rubber spatula as needed. 
  • Reduce the mixer speed to low/stir; then add dry ingredients, and mix until just combined.
  • Add the chocolate pieces and stir with a silicone spatula or spoon to incorporate the chocolate. Do not use the mixer paddle at this point because you'll break the chocolate pieces if you do. 
  • Using a medium cookie scoop (about 2 tablespoons), scoop all cookie dough into balls and place on a wax paper-lined cookie sheet. Cover and refrigerate for at least 24 hours.
  • When you’re ready to bake, preheat oven to 350°F. Line a baking sheet with parchment paper or a nonstick baking mat.
  • Arrange dough balls 2 inches apart on prepared baking sheet.
  • Bake at 350 degrees for 12-14 minutes, or until puffed, matte looking (not wet and shiny), and the edges are lightly browned.
  • Allow to cool on baking sheet at least 5 minutes before removing carefully to a wire rack to cool completely. Alternately, if you have a baking sheet that lacks rims on some sides, you can slide the parchment with the baked cookies onto a cooling rack to cool right when you remove them from the oven.
  • Continue baking the remainder of the dough balls, or place in the freezer. Once frozen solid, move dough balls to a zip-top freezer bag. Keep in the freezer and bake up a few at a time as needed.

Makes about 5 dozen cookies


Your tempered chocolate should look like this when it's cut up.

There are nuts in this image of the ingredients, but they're optional, of course.


These will be frozen for baking at a later date.

Layers of dark chocolate. Mmm. So good. 


Thursday, December 8, 2022

Heidi's Pecan Pie


Heidi's Pecan Pie

Last Thanksgiving was the first time I ever actually tasted pecan pie. Call me an apple-pie-person. At any rate, my dear sister-in-law Heidi always makes the pecan pie for Thanksgiving dinner. She really just follows the recipe on the back of the Karo Syrup bottle, with one small tweak: she adds a teaspoon of butter flavor/extract, and it really makes all the difference in the world.

The fact that Heidi's pecan pie is superior to other pecan pies was proven to me yesterday when I tried some Perkins Restaurant pecan pie that was left over from our holiday meeting at work. The pecan pie tasted fine, but not delicious, and not really worth the calories, in my opinion. (Sorry, Perkins.) The big difference, I think, was the butter flavor. Mmmm.

So, if you are already a pecan pie fan, or are open to the idea, give this recipe a whirl. Hopefully you'll enjoy it as much as I have. 

(Note: The pie picture here is a half-recipe pie baked in a 6-inch glass pie pan.)


Heidi's Pecan Pie
   -- Adapted from Karo Syryp's Homemade Pecan Pie recipe

Ingredients:
  • 1 cup light corn syrup
  • 3 eggs, beaten lightly, room temperature
  • 1 cup white sugar
  • 2 tablespoons butter, melted & cooled
  • 1 teaspoon vanilla extract
  • 1 teaspoon butter flavor/extract
  • 1 3/4 cup pecans (about 8 oz)
  • 1 unbaked 9-inch pie crust (see recipe below)
Instructions:
  • Preheat oven to 350 degrees Fahrenheit and line a baking sheet with foil or parchment.
  • Place the corn syrup, eggs, sugar, butter, vanilla extract, and butter flavor/extract into a bowl and stir with a spoon.
  • Stir in the pecans.
  • Place the unbaked pie crust onto the prepared baking sheet, and then pour the liquid & pecan mixture into the pie crust.
  • Bake at 350 degrees for 60-70 minutes, or until the internal temperature of the pie reaches 200 degrees Fahrenheit.
  • Remove from oven and place on a wire rack to cool completely and then refrigerate so the pie can set up. After that you can serve cold or at room temperature.
  • Cover and store leftovers in the refrigerator.

Makes 1 9-inch pie

(Note: the pie pictured here is a half-size pie.)

Liquid ingredients mixed and ready for pecans


You'll end up with quite a bit of pie crust scraps.


Pie Crust

Ingredients: 
  • 1 1/4 cups all-purpose flour, plus more for dusting
  • 1/2 teaspoon salt
  • 4 tablespoons butter, cut into 1/2 inch pieces
  • 3 tablespoons vegetable shortening
  • 3-4 tablespoons ice cold water
Instructions:
  • Place flour and salt in a medium size bowl and stir to distribute the salt evenly.
  • Cut in the 4 tablespoons of butter until butter is in 1/4-inch chunks.
  • Cut in the vegetable shortening until the shortening is in 1/4-inch chunks, and the butter is cut pretty finely.
  • Add the cold water to the mixture by sprinkling in one tablespoon at a time while you toss with a fork. 
  • After you've added 3 tablespoons of water, try squeezing the dough together. If it does not stick well, add up to 1 more tablespoon of water and mixt just until combined. You will have a lot of dry parts, but that's okay.
  • Start pressing and squeezing the dough to form a cohesive ball. Try not to overwork the dough or else you'll end up with a tough crust.
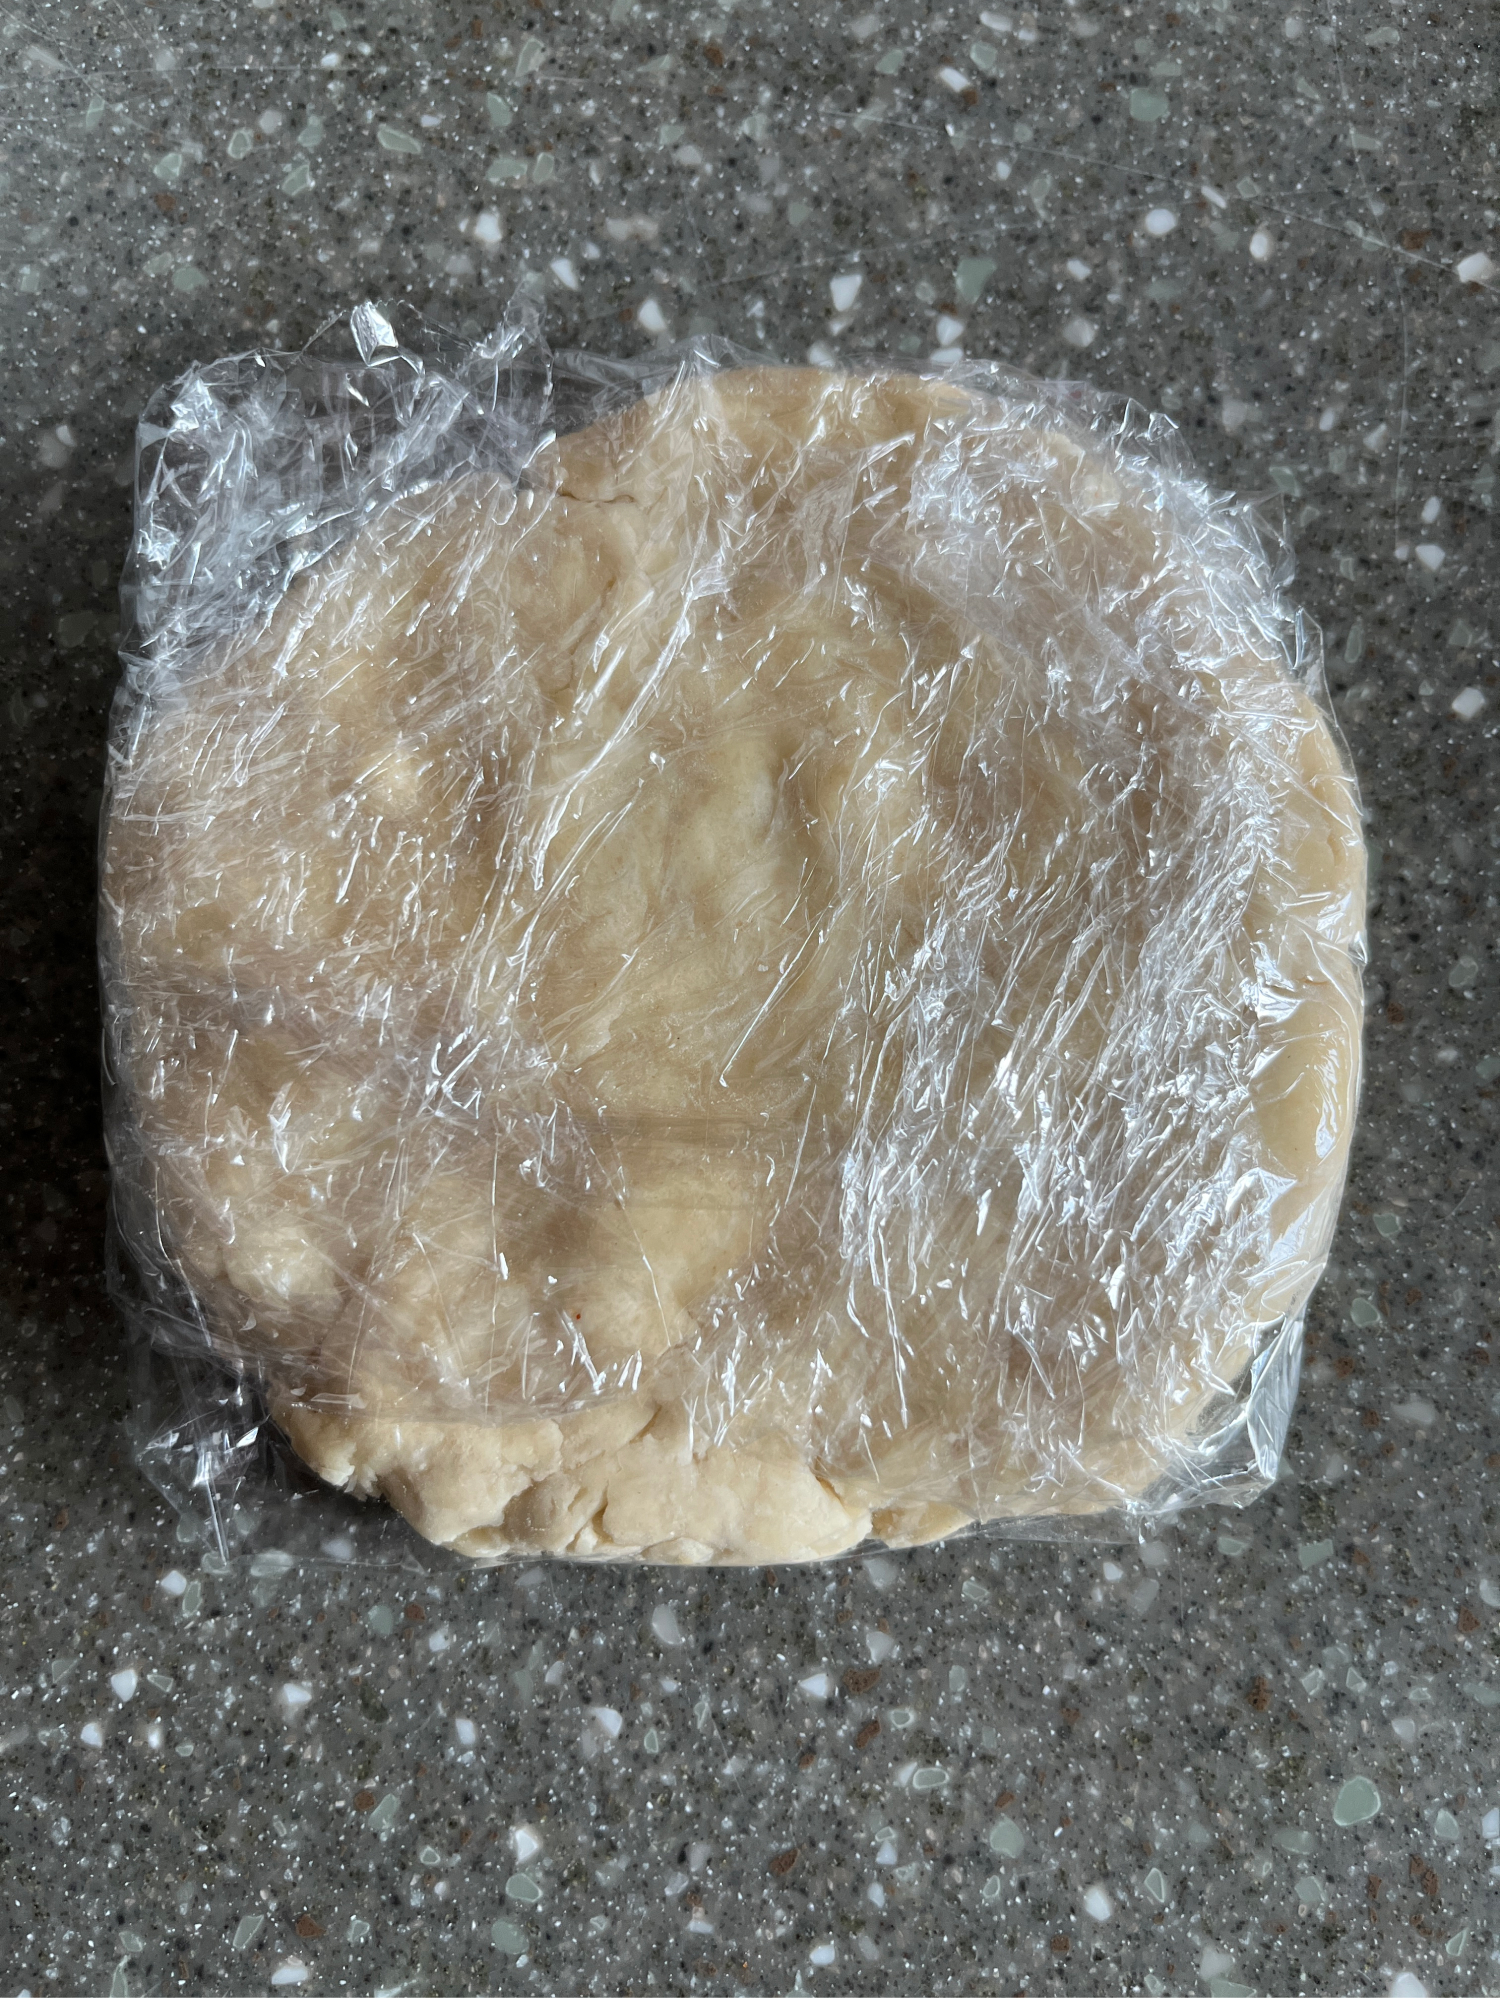
  • Once the dough is cohesive, place a 1 foot piece of plastic wrap on the counter and then try to form the dough into a disk on top of the plastic. Smoosh the disk to about 6-7 inches in diameter. Wrap the dough in the plastic wrap and refrigerate while you prepare the pie filling.
  • Roll the dough to a thickness of 1/8 inch. 
  • If dough is nowhere near a perfect circle shape, cut off a piece that sticks out, dab with a little water, and place on a spot that needs more dough. Continue to roll out until you have a circle of crust that will fill the pie plate.
  • If you're not sure what to do at this point, you're probably best off going over to Youtube to see how other people form and shape their pie crust. My words won't do the process justice.
  • Makes one 9-inch pie crust 
Mixture before adding water

After stirring in water

The cohesive mass

Wrapped and ready for refrigeration


Sunday, September 19, 2021

Dark Chocolate & Brown Sugar Cookies (Brownie Cookies)

Dark Chocolate Brown Sugar Cookies


I found this recipe on Instagram, and I've made it several times already. I hadn't intended to add it to this blog, but I don't have a better system of locating recipes I like, even if I've saved them on Pinterest or Instagram. Plus (sorry Callmepmc) the original website has too many pop-up adds and preliminary text for my desired baking speed, so I'm putting the recipe here for easy reference. 
I've also doubled the original recipe because 1. They are THAT good, and 2. The dough freezes nicely for baking later.
These cookies might better be named "Brownie Cookies" because that's really what they are: brownies in cookie form. They have the perfect level of sweetness and moisture. Their flavor and texture are remarkably satisfying. Chocolatey, dense, sweet, buttery. Mmm.
I like adding the nuts on the outside, and sometimes I will roll them in chocolate sprinkles (vermicelli). They're also fantastic plain. 
That's all I have to say for now. Give these a try, and I'm pretty certain you will want to save this recipe too.

Note: Today I went all Claire Saffitz on these cookies and browned half of the butter. It's the first time I've tried that with these cookies, and you should feel free to NOT brown the butter if you so choose.


Dark Chocolate & Brown Sugar Cookies
      Adapted from Callmepmc.com

Ingredients:
  • 1 cup butter, softened
  • 1 1/2 cups brown sugar (I used half dark/half light)
  • 2 large eggs
  • 2 teaspoons vanilla extract
  • 3 cups all purpose flour
  • 1 cup unsweetened dark cocoa powder (any Dutch processed cocoa is good)
  • 2 teaspoons cornstarch
  • 1 1/2 teaspoons baking soda
  • 1/4 teaspoon salt
  • 1 to 2 cups chopped toasted nuts (optional)
Instructions:
  • Brown half the butter by placing it in a small saucepan over medium heat. Melt and stir occasionally until there are browned bits in the bottom and it isn't sputtering very much. Allow browned butter to cool completely before adding it to the other ingredients. (I learned the hard way you need to wait until it's cooled.)
  • In the bowl of a stand mixer fitted with a paddle attachment, place the other 1/2 cup of butter and brown sugar. 
  • Pour cooled browned butter into the mixing bowl over the butter and sugar. Mix on high for about 2-3 minutes, or until light and fluffy.
  • Add the eggs and vanilla and mix on high for another 2-3 minutes until incorporated.
  • In a separate bowl, whisk together the flour, cocoa powder, baking soda, corn starch & salt. Stir into the wet mixture until combined. Scrape down the sides of the bowl as needed.
  • Cover bowl and refrigerate for at least one hour.*
  • Preheat oven to 350 degrees Fahrenheit & line a baking sheet with parchment paper.
  • Scoop dough into about 2 to 2 1/2 tablespoon portions and place 2 inches apart on prepared baking sheet.
  • If you would like nuts in/on your cookies, roll the raw dough ball in the chopped nuts to cover and gently press nuts in to make sure they stick. 
  • Flatten the cookies slightly with your fingers so you end up with a 1/2 inch thick disk.
  • Bake at 350 degrees Fahrenheit for 9-10 minutes, or until puffed and edges are set. 
  • Remove from oven and allow to cool at least 2 minutes before transferring to a wire rack to cool completely.
  • Store in an airtight container.
*If you do not want to bake all of your dough in one day, you can form the balls (& optionally roll in nuts), flatten, and freeze on a baking sheet. When cookie dough disks are completely frozen, transfer to a gallon sized zip-top bag. I would recommend using frozen dough within 3 months.


01 09